
Introduction
Keeping your kitchen faucet head clean is essential for maintaining a hygienic kitchen. However, over time, mineral deposits can build up, making it difficult to remove dirt and grime. This article provides a comprehensive guide on how to clean and maintain your kitchen faucet head. Whether you’re a novice or an experienced cleaner, this guide will help make the process easier.
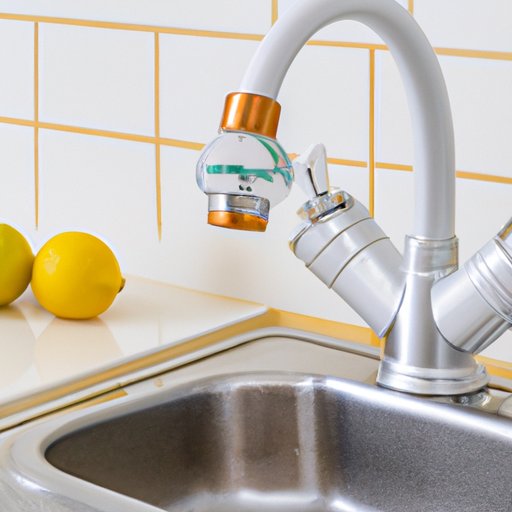
Step-by-Step Guide to Cleaning a Kitchen Faucet Head
Cleaning your kitchen faucet head isn’t difficult, but it does require some time and effort. Here’s a step-by-step guide on how to do it:
Step 1: Gather supplies. You’ll need a soft-bristled brush, soapy water, and a cloth or sponge. If you have any commercial cleaners, they may come in handy as well.
Step 2: Disassemble the faucet head. Carefully unscrew the faucet head from the base of the sink. Once it’s removed, take apart any other parts that are connected to it.
Step 3: Clean with soapy water. Soak the faucet head and its components in hot, soapy water for about 15 minutes. This will help loosen any dirt and grime that has built up over time.
Step 4: Scrub off mineral deposits. Use a soft-bristled brush to gently scrub away any mineral deposits that have accumulated on the faucet head. Be sure to pay special attention to areas where dirt and grime may be hiding.
Step 5: Rinse thoroughly. Once you’ve finished scrubbing, rinse the faucet head and its components with running water. This will help ensure that all of the soap residue is washed away.
Step 6: Reassemble the faucet head. Carefully reassemble the faucet head and its components and screw it back into place. Make sure the connections are tight and secure.

How to Easily Remove Mineral Deposits from Your Kitchen Faucet Head
If you’ve noticed stubborn mineral deposits on your kitchen faucet head, don’t worry – there are several easy ways to remove them. Here are a few tips:
Use vinegar and baking soda. Mix equal parts vinegar and baking soda to create a paste. Apply the paste to the affected area and let it sit for 10-15 minutes. Then, use a soft-bristled brush to scrub away the mineral deposits.
Try using a commercial cleaner. There are plenty of commercial products available that are specifically designed to remove mineral deposits. Follow the instructions on the package and apply the product to the affected area.
Create a lemon juice mixture. Mix equal parts lemon juice and water. Then, apply the mixture to the affected area and let it sit for 10-15 minutes. Finally, use a soft-bristled brush to scrub away the mineral deposits.

A Comprehensive Guide to Cleaning and Maintaining Your Kitchen Faucet Head
Regularly cleaning and maintaining your kitchen faucet head will help keep it looking and functioning great for years to come. Here are a few tips:
Regular cleaning. Make sure to clean your kitchen faucet head at least once a month. This will help prevent mineral buildup and ensure that it remains free of dirt and debris.
Preventing mineral buildup. Hard water can leave behind mineral deposits on your kitchen faucet head. To prevent this, try installing a water filter or adding a water softener to your home.
Tips for maintaining a sparkling finish. After every use, wipe down the faucet head with a damp cloth. This will help keep it looking shiny and new. Additionally, try using distilled water when possible to avoid mineral buildup.

DIY: Cleaning Your Kitchen Faucet Head in 5 Simple Steps
Cleaning your kitchen faucet head doesn’t have to be complicated or time-consuming. Here’s a quick and easy DIY guide:
Step 1: Disassemble the faucet head. Carefully unscrew the faucet head from the base of the sink. Once it’s removed, take apart any other parts that are connected to it.
Step 2: Soak the parts in hot, soapy water. Place the faucet head and its components in a bowl or bucket filled with hot, soapy water. Let them soak for 15 minutes to loosen any dirt and grime.
Step 3: Scrub the parts with a soft-bristled brush. Use a soft-bristled brush to gently scrub away any dirt or grime. Pay special attention to areas where mineral deposits may have built up.
Step 4: Rinse the parts with running water. Once you’ve finished scrubbing, rinse the faucet head and its components with running water. This will help ensure that all of the soap residue is washed away.
Step 5: Reassemble the faucet head. Carefully reassemble the faucet head and its components and screw it back into place. Make sure the connections are tight and secure.
Quick Tips for Keeping Your Kitchen Faucet Head Sparkling Clean
Keeping your kitchen faucet head sparkling clean is easy if you follow these simple tips:
Clean regularly. Set a schedule for cleaning your kitchen faucet head and stick to it. This will help keep it looking and functioning great for years to come.
Wipe down after every use. After you’ve finished washing dishes or filling a pot with water, be sure to wipe down the faucet head with a damp cloth. This will help prevent mineral buildup.
Use distilled water when possible. Distilled water is free of minerals, which makes it perfect for cleaning your kitchen faucet head. Try to use it whenever possible.
Use a soft-bristled brush. When cleaning your kitchen faucet head, always use a soft-bristled brush. This will help avoid scratching the finish.
Conclusion
Cleaning and maintaining your kitchen faucet head doesn’t have to be complicated or time-consuming. With the right supplies and a little bit of elbow grease, you can easily keep your kitchen faucet head looking and functioning like new. Follow the steps outlined in this article and you’ll be well on your way to a sparkling clean kitchen faucet head.
Now that you know how to clean and maintain your kitchen faucet head, it’s time to get started! Put on your rubber gloves and grab your supplies – it’s time to get to work.