
Introduction
When it comes to laundry, nothing is more frustrating than dealing with a malfunctioning dryer. Fortunately, many common dryer issues can be resolved quickly and easily, even by a novice DIYer. One of the most common problems with dryers is a faulty or worn-out heating element. If you own a Samsung dryer, replacing the heating element is a relatively simple task. This article will provide a step-by-step guide on how to change the heating element in a Samsung dryer.
Step-by-Step Guide for Replacing the Heating Element in a Samsung Dryer
The first step in replacing the heating element in a Samsung dryer is to unplug the dryer from the wall outlet. This is an important safety precaution that should not be overlooked. Once the dryer is unplugged, you will need to locate and remove the back panel of the dryer. You may need to use a screwdriver to remove the screws that are holding the panel in place.
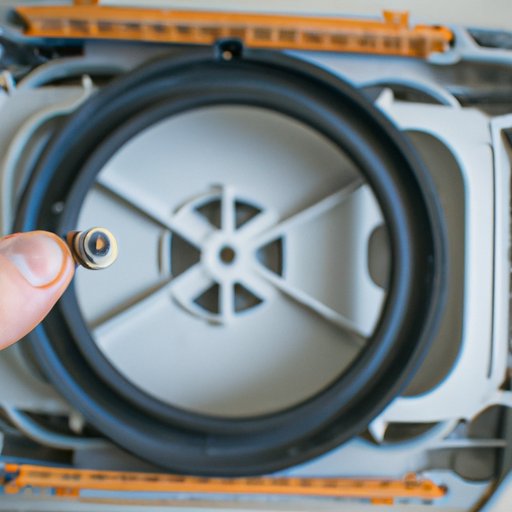
Once the back panel is removed, you can locate the heating element. The heating element is usually located near the bottom center of the dryer. You will need to disconnect the wires that are attached to the heating element. Be sure to take note of which wire goes where so that you can reconnect them correctly when installing the new element.
With the old heating element disconnected, you can now install the new one. Simply connect the new element to the wires that you disconnected from the old one, making sure to connect them properly. After the new element is in place, you can reassemble the dryer by putting the back panel back on and tightening the screws.
How to Easily Change Out Your Samsung Dryer’s Heating Element
Before attempting to replace the heating element in your Samsung dryer, you should gather all of the necessary tools and supplies. You will need a screwdriver, a pair of pliers, and a new heating element. It is also a good idea to have a flashlight handy in case you need to see into tight spaces.
You should also prepare the work space before beginning the repair. Make sure there is plenty of room to move around and that the area is free of any debris or clutter. Make sure the floor is dry and free of slippery surfaces.
Safety should always be a top priority when working with electrical appliances. Always wear protective eyewear and gloves when handling the heating element. Also, make sure the dryer is unplugged and the power is off before beginning any work.
Once you have gathered the necessary tools and prepared the work space, you can follow the step-by-step guide provided above to replace the heating element in your Samsung dryer. With the right preparation and knowledge, you can easily replace the heating element in your dryer and get back to doing laundry without any more hassle.
A Beginner’s Guide to Changing the Heating Element in a Samsung Dryer
If you are a beginner when it comes to home repairs, changing the heating element in your Samsung dryer may seem like a daunting task. But with the right preparation, knowledge, and tools, the process can be surprisingly simple. Before attempting to replace the heating element, it is important to identify the parts involved and familiarize yourself with the process.
Make sure you have the appropriate tools ready before beginning the repair. A screwdriver, a pair of pliers, and a new heating element are all essential. You may also want to have a flashlight handy in case you need to see into tight spaces. And as always, make sure the dryer is unplugged and the power is off before beginning any work.
It is also important to take precautions and follow instructions carefully when replacing the heating element. Read through the instructions provided in this article before beginning the repair, and make sure you understand each step. If you have any questions or concerns, it is best to seek professional help to ensure the job is done safely and correctly.

How to Replace the Heating Element in a Samsung Dryer in 5 Simple Steps
Replacing the heating element in a Samsung dryer is a relatively straightforward process that can be completed in five simple steps. First, unplug the dryer from the wall outlet. Second, remove the back panel of the dryer using a screwdriver. Third, disconnect the old heating element. Fourth, connect the new heating element. And finally, reassemble the dryer by putting the back panel back on and tightening the screws.
How to Swap Out Your Samsung Dryer’s Heating Element with Ease
Before beginning the repair, it is important to prepare the work space and gather the necessary tools. Make sure the area is free of debris and clutter and that the floor is dry and free of slippery surfaces. You will need a screwdriver, a pair of pliers, and a new heating element. You may also want to have a flashlight handy in case you need to see into tight spaces.
Once the work space is prepared, you can begin the process of removing the old heating element. Make sure the dryer is unplugged and the power is off before beginning any work. Carefully disconnect the wires that are attached to the heating element, taking note of which wire goes where. Then, remove the old heating element and set it aside.
Next, you will need to install the new heating element. Connect the new element to the wires that you disconnected from the old one, making sure to connect them properly. After the new element is in place, you can reassemble the dryer by putting the back panel back on and tightening the screws.
Finally, do a few final checks to make sure the repair was successful. Plug the dryer back in and turn it on. Make sure the dryer is heating up properly and that the temperature is consistent. If everything seems to be working correctly, you can close up the dryer and enjoy the peace of mind that comes with a successful repair.
Get the Most Out of Your Samsung Dryer by Replacing the Heating Element
Regular maintenance is key to ensuring that your Samsung dryer operates at its peak performance. Replacing the heating element in your dryer every few years can help to keep it running smoothly and prevent future breakdowns. It is also important to routinely clean the lint trap and vents to keep the dryer free of built-up debris.
Another way to get the most out of your Samsung dryer is to make sure that the air vent is unobstructed. This will help to ensure that the air flows freely, allowing the dryer to operate more efficiently. Additionally, it is important to make sure that the dryer is level so that it can spin properly.
If you are experiencing any issues with your dryer, such as slow drying times or uneven temperatures, it is best to seek professional help. A qualified technician can diagnose the problem and recommend the best course of action. They can also provide helpful tips and advice on how to maintain your dryer and get the most out of it.
Conclusion
Replacing the heating element in a Samsung dryer is a relatively simple task that can be completed in just a few steps. First, unplug the dryer from the wall outlet. Next, remove the back panel, locate the heating element, and disconnect the wires. Then, install the new heating element, reassemble the dryer, and do a few final checks. With the right preparation and knowledge, you can easily and safely replace the heating element in your dryer.
Regular maintenance is key to keeping your dryer running at peak performance. Clean the lint trap and vents regularly and make sure the air vent is unobstructed. If you are experiencing any issues with your dryer, it is best to seek professional help. By following these simple steps, you can ensure that your Samsung dryer is operating smoothly and reliably.
Final Thoughts
Replacing the heating element in your Samsung dryer is a relatively simple task that can be completed in just a few steps. With the right preparation and knowledge, you can easily and safely complete the repair. Regular maintenance is also key to keeping your dryer running at peak performance. Make sure to clean the lint trap and vents regularly and seek professional help if you are experiencing any issues.