
Introduction
Many homes have older appliances with outdated cords. While some may not think twice about it, upgrading an appliance to use a newer cord can be beneficial. This guide will cover how to change a dryer cord from 4 prongs to 3, including the advantages of each cord type and the steps involved in the process.

Understanding the Difference between 4 and 3 Prong Dryer Cords
The two most common types of dryer cords are 4 prong and 3 prong. The 4 prong cord is generally used for newer dryers, while the 3 prong is typically found on older models. Both cords provide power to the dryer, but there are a few key differences to consider when deciding which one you should use.
Advantages of 4 Prong Cords
The major advantage of using a 4 prong cord is that it is more modern and safer than a 3 prong cord. It has an additional ground wire that helps protect against electric shock in the event of a short circuit. It also has a separate neutral wire, which provides a return path for the current.
Advantages of 3 Prong Cords
The 3 prong cord is less expensive and easier to install than its 4 prong counterpart. It also works with older models of dryers, so if you have an older model and need to replace the cord, it is a good option. However, it does not offer the same level of protection as a 4 prong cord and should only be used if necessary.
Step-by-Step Guide on How to Change a Dryer Cord from 4 Prongs to 3
Changing a dryer cord from 4 prongs to 3 is relatively simple and can be done in a few easy steps. Before you begin, make sure to unplug your dryer from the wall outlet and turn off the breaker to ensure your safety.
Unplugging the Old Cord
The first step is to unplug the old cord from the wall outlet and the dryer. Make sure to disconnect any clamps or straps holding the cord in place before attempting to remove it.
Removing the Old Cord
Once the cord is unplugged, you can remove it from the dryer. You may need to use a screwdriver or pliers to loosen the mounting screws and remove the cord. Make sure to keep track of the screws and other parts so you can use them when installing the new cord.
Installing the New Cord
After removing the old cord, you can install the new one. Start by attaching the mounting plate to the back of the dryer, then secure the cord to the plate with the screws you removed earlier. Make sure the cord is securely fastened and won’t come loose.
Connecting the Wires
Next, connect the wires to their respective terminals on the dryer. Follow the wiring diagram included with the new cord to ensure you’re connecting the correct wires. Make sure all the connections are secure and will not come loose.
Testing the New Cord
Once the cord is installed and the wires are connected, it’s time to test the new cord. Plug the cord into the wall outlet and turn on the breaker. If everything is working properly, your dryer should start running normally.
How to Replace Your Dryer’s Power Cord from 4 Prongs to 3 in 6 Easy Steps
Replacing the power cord on your dryer is a straightforward process that can be completed in 6 easy steps. To get started, gather the necessary tools, such as a screwdriver, pliers, and a new 3 prong dryer cord.
Gather Necessary Tools
The first step is to gather the necessary tools. These include a screwdriver, pliers, and a new 3 prong dryer cord. Make sure you have all the tools you need before beginning the process.
Disconnect the Old Cord
Once you have the necessary tools, it’s time to disconnect the old cord. Unplug the cord from the wall outlet and the dryer, then remove any clamps or straps holding the cord in place.
Install the New Cord
Now it’s time to install the new cord. Start by attaching the mounting plate to the back of the dryer, then secure the cord to the plate with the screws you removed earlier. Make sure the cord is firmly attached and won’t come loose.
Connect the Wires
After the cord is installed, connect the wires to their respective terminals on the dryer. Refer to the wiring diagram included with the new cord to ensure you’re connecting the correct wires. Make sure all the connections are secure and will not come loose.
Test the New Cord
Finally, it’s time to test the new cord. Plug the cord into the wall outlet and turn on the breaker. If everything is working properly, your dryer should start running normally.

Changing the Plug on Your Dryer from 4 Prongs to 3 in 6 Easy Steps
If you’re looking to upgrade your dryer from a 4 prong plug to a 3 prong plug, the process is relatively simple and can be done in 6 easy steps. Gather the necessary tools, such as a screwdriver, pliers, and a new 3 prong dryer plug.
Gather Necessary Tools
The first step is to gather the necessary tools. These include a screwdriver, pliers, and a new 3 prong dryer plug. Make sure you have all the tools you need before beginning the process.
Unplug the Old Cord
Once you have the necessary tools, it’s time to unplug the old cord. Disconnect the cord from the wall outlet and the dryer, then remove any clamps or straps holding the cord in place.
Remove the Old Cord
Once the cord is unplugged, you can remove it from the dryer. You may need to use a screwdriver or pliers to loosen the mounting screws and remove the cord. Make sure to keep track of the screws and other parts so you can use them when installing the new cord.
Install the New Cord
After removing the old cord, you can install the new one. Start by attaching the mounting plate to the back of the dryer, then secure the cord to the plate with the screws you removed earlier. Make sure the cord is securely fastened and won’t come loose.
Connect the Wires
Next, connect the wires to their respective terminals on the dryer. Follow the wiring diagram included with the new cord to ensure you’re connecting the correct wires. Make sure all the connections are secure and will not come loose.
Test the New Cord
Once the cord is installed and the wires are connected, it’s time to test the new cord. Plug the cord into the wall outlet and turn on the breaker. If everything is working properly, your dryer should start running normally.
A Comprehensive Guide to Converting a 4-Prong Dryer Cord to 3 Prongs
Converting a dryer cord from 4 prongs to 3 prongs is a simple process that can be done in a few easy steps. Before you begin, make sure to unplug your dryer from the wall outlet and turn off the breaker to ensure your safety. Then gather the necessary tools, such as a screwdriver, pliers, and a new 3 prong dryer cord.
Gather Necessary Tools
The first step is to gather the necessary tools. These include a screwdriver, pliers, and a new 3 prong dryer cord. Make sure you have all the tools you need before beginning the process.
Unplug the Old Cord
Once you have the necessary tools, it’s time to unplug the old cord. Disconnect the cord from the wall outlet and the dryer, then remove any clamps or straps holding the cord in place.
Remove the Old Cord
Once the cord is unplugged, you can remove it from the dryer. You may need to use a screwdriver or pliers to loosen the mounting screws and remove the cord. Make sure to keep track of the screws and other parts so you can use them when installing the new cord.
Install the New Cord
After removing the old cord, you can install the new one. Start by attaching the mounting plate to the back of the dryer, then secure the cord to the plate with the screws you removed earlier. Make sure the cord is securely fastened and won’t come loose.
Connect the Wires
Next, connect the wires to their respective terminals on the dryer. Follow the wiring diagram included with the new cord to ensure you’re connecting the correct wires. Make sure all the connections are secure and will not come loose.
Test the New Cord
Once the cord is installed and the wires are connected, it’s time to test the new cord. Plug the cord into the wall outlet and turn on the breaker. If everything is working properly, your dryer should start running normally.
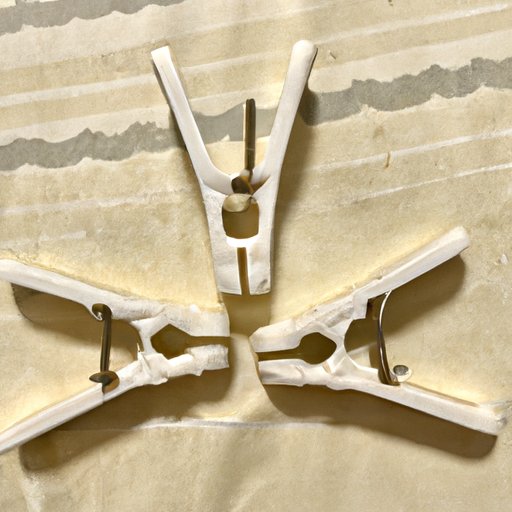
From 4 Prongs to 3: An Illustrated Guide on Replacing a Dryer Cord
Replacing a dryer cord from 4 prongs to 3 is a simple process that can be done in a few easy steps. To help you understand the process better, here is an illustrated guide on how to change a dryer cord from 4 prongs to 3.
Step-by-Step Instructions
The first step is to unplug the old cord from the wall outlet and the dryer. Next, remove the old cord from the dryer and install the new one, making sure to secure it with the screws you removed earlier. Connect the wires to their respective terminals, following the wiring diagram included with the new cord. Finally, plug the cord into the wall outlet and turn on the breaker to test the new cord.
Visual Illustrations
To help further illustrate the process, here is a series of images that show how to change a dryer cord from 4 prongs to 3.
All You Need to Know about Upgrading a 4-Prong Dryer Cord to 3 Prongs
Upgrading a dryer cord from 4 prongs to 3 prongs is a relatively simple process that can be done in a few easy steps. Before you begin, make sure to review the necessary tools, such as a screwdriver, pliers, and a new 3 prong dryer cord.
Review of Necessary Tools
The first step is to gather the necessary tools. These include a screwdriver, pliers, and a new 3 prong dryer cord. Make sure you have all the tools you need before beginning the process.
Overview of the Process
Once you have the necessary tools, it’s time to begin the process. Start by unplugging the old cord from the wall outlet and the dryer. Remove the old cord from the dryer and install the new one, making sure to secure it with the screws you removed earlier. Connect the wires to their respective terminals, following the wiring diagram included with the new cord. Finally, plug the cord into the wall outlet and turn on the breaker to test the new cord.
Tips for Ensuring Safety
Before beginning the process, make sure to unplug your dryer from the wall outlet and turn off the breaker to ensure your safety. Additionally, make sure all the connections are secure and the cord is firmly attached to the dryer before testing the new cord.
Conclusion
Changing a dryer cord from 4 prongs to 3 is a relatively simple process that can be done in a few easy steps. Make sure to unplug your dryer from the wall outlet and turn off the breaker to ensure your safety. Then gather the necessary tools, such as a screwdriver, pliers, and a new 3 prong dryer cord. Unplug the old cord, remove it from the dryer, install the new one, connect the wires, and test the new cord. With these steps, you can easily upgrade your dryer cord from 4 prongs to 3 in no time.