
Introduction
A dryer belt is an essential part of any clothes dryer. It helps to rotate the drum so that the clothes can be dried properly. Over time, the belt may become worn or damaged, causing the dryer to stop working. Replacing the belt is a relatively simple task that can be done in just a few minutes. In this article, we will discuss what a dryer belt is and why it might need to be replaced. We will then provide a step-by-step guide to replacing a dryer belt, as well as some tips for beginners and DIYers.
Definition of a Dryer Belt
A dryer belt is a thin rubber belt that connects the motor to the dryer drum. The belt wraps around the drum and helps to rotate it during the drying cycle. Without the belt, the dryer will not be able to properly dry clothes. If the belt is worn or damaged, it will need to be replaced.

Overview of Reasons Why a Dryer Belt May Need to Be Replaced
There are several reasons why a dryer belt may need to be replaced. The most common reason is wear and tear. Over time, the belt can become stretched or frayed, which can cause it to slip off the drum or break. Another reason is damage from foreign objects. If something gets caught in the belt, it can cause it to tear or break. Finally, if the dryer has been moved or installed incorrectly, it can cause the belt to stretch or fray prematurely.
Step-by-Step Guide to Replacing a Dryer Belt
Replacing a dryer belt is a relatively simple process that can be done in just a few minutes. Here are the steps you need to take:
1. Prepare the Area
Before starting, make sure the area is clear and free of any flammable materials. Move any items that may get in the way and turn off the power source. Make sure the dryer is unplugged and all water lines are disconnected.
2. Disconnect the Dryer from Power Sources
Unplug the dryer from the wall outlet. If there is a gas line connected to the dryer, make sure it is also disconnected.
3. Remove the Back Panel
The back panel of the dryer will need to be removed in order to access the belt. Depending on the model of the dryer, this may require removing screws or other fasteners. Once the panel is removed, you should be able to see the belt.
4. Remove the Old Belt
Once the back panel is removed, you can remove the old belt. To do this, simply lift the belt off the pulleys and slide it out. Make sure to keep track of any washers or other parts that may have come off with the belt.
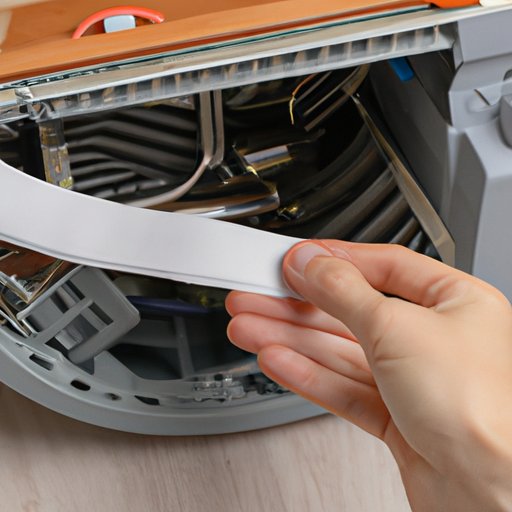
5. Install the New Belt
Once the old belt has been removed, the new belt can be installed. Place the new belt onto the pulleys, making sure it is aligned correctly. Then, use a screwdriver or other tool to tighten the belt. Make sure not to overtighten, as this can cause the belt to stretch prematurely.
6. Reassemble the Dryer
Once the new belt is installed, the back panel can be reattached. Make sure all screws and fasteners are tightened securely. Then, reconnect the dryer to the power source.
7. Testing the Dryer
Finally, once the dryer is reassembled, it’s time to test it. Plug the dryer in and turn it on. Make sure the drum is spinning properly and that the belt is not slipping. If everything looks good, the job is complete.

How to Change a Dryer Belt in 5 Easy Steps
If you’re looking for a quick and easy way to replace your dryer belt, here are the five steps you need to take:
Step 1: Prepare the Area
Clear the area of any flammable materials and make sure the dryer is unplugged and all water lines are disconnected.
Step 2: Disconnect the Dryer from Power Sources
Unplug the dryer from the wall outlet and disconnect any gas lines.
Step 3: Remove the Back Panel
Remove the back panel of the dryer in order to access the belt.
Step 4: Remove the Old Belt
Lift the old belt off the pulleys and slide it out.
Step 5: Install the New Belt
Place the new belt onto the pulleys, making sure it is aligned correctly, and use a screwdriver or other tool to tighten the belt.
A Beginner’s Guide to Changing a Dryer Belt
Changing a dryer belt can seem like a daunting task, but it doesn’t have to be. With the right tools and supplies, and a little patience, anyone can do it. Here are some tips for beginners who are looking to replace their dryer belt:
What Tools Will You Need?
In order to replace a dryer belt, you’ll need a few basic tools. These include a Phillips head screwdriver, a flathead screwdriver, pliers, and a belt tensioner (if applicable). You may also need a putty knife or other tool to remove the back panel.
Safety Considerations
When working with electricity, it’s always important to practice proper safety procedures. Make sure to unplug the dryer before beginning work, and never attempt to repair the dryer while it is plugged in. Additionally, make sure to keep any flammable materials away from the area.
Troubleshooting Tips
If the dryer isn’t working after replacing the belt, there are a few things you can try. Make sure the belt is properly aligned and tightened, and check for any obstructions in the drum or ductwork. If the problem persists, it may be time to call a professional.
DIY: How to Change a Dryer Belt Quickly and Easily
If you’re looking for a quick and easy way to replace your dryer belt, here are the steps you need to take:
Gather Necessary Tools and Supplies
Gather the necessary tools and supplies, such as a Phillips head screwdriver, a flathead screwdriver, pliers, and a belt tensioner (if applicable). Make sure the area is clear and free of any flammable materials.
Follow Step-by-Step Instructions
Follow the step-by-step instructions provided in this article to replace the belt. Make sure to unplug the dryer before beginning work, and take all necessary safety precautions.
Make Sure Everything Is Working Properly
Once the new belt is installed, plug the dryer in and turn it on. Make sure the drum is spinning properly and that the belt is not slipping. If everything looks good, the job is complete.

The Ultimate Guide to Replacing a Dryer Belt
Replacing a dryer belt is a simple task that can be done in just a few minutes. However, there are a few things you should know before getting started. Here are some tips for finding the right dryer belt and knowing when it’s time to replace it:
Understanding Different Types of Dryer Belts
Not all dryer belts are created equal. Different models of dryers use different types of belts, so make sure to check the manual for the correct type. Most dryers use V-belts, but some may use flat belts or other types.
Knowing When It’s Time to Replace Your Dryer Belt
Most dryer belts will last several years, but they can become worn or damaged over time. If your dryer is not spinning properly or is making strange noises, it may be time to replace the belt. Additionally, if the belt is cracked or frayed, it should be replaced immediately.
Tips for Finding the Right Dryer Belt
Finding the right dryer belt can be tricky. Make sure to check the manual for the correct type, and measure the belt to make sure it fits properly. Additionally, make sure the belt is rated for the temperature of the dryer—some belts are only rated for low temperatures.
Conclusion
Replacing a dryer belt is a relatively simple task that can be done in just a few minutes. First, prepare the area and disconnect the dryer from power sources. Next, remove the back panel and the old belt. Then, install the new belt and reassemble the dryer. Finally, test the dryer to make sure everything is working properly. With the right tools and supplies, and a little patience, anyone can do it.