
Introduction
Changing a tire on a dirt bike is an essential skill for any rider. Not only can it save you time and money, but it can also help keep you safe while out on the trails. In this article, we will provide a comprehensive step-by-step guide with pictures to help you learn how to change a tire on your dirt bike. We’ll also include a video tutorial, a list of tools needed, safety tips, FAQs, and a troubleshooting guide to help you if you encounter any problems along the way.
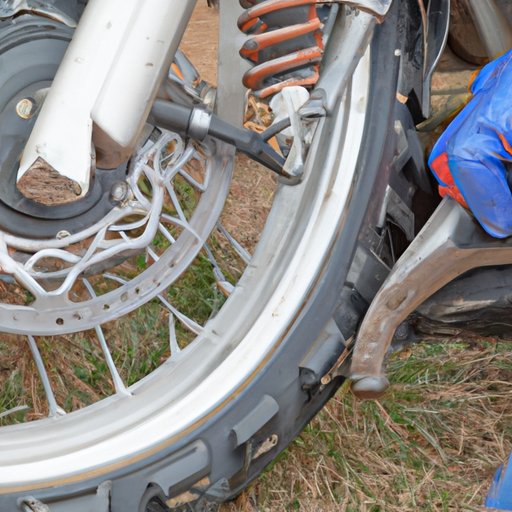
Step-by-Step Tutorial with Pictures
Changing a tire on a dirt bike is relatively easy once you know the steps. Here’s a step-by-step guide with pictures to help you through the process.
Preparing the Bike
The first step is to prepare the bike for the tire change. You’ll want to make sure the bike is stable by placing it on a stand or laying it down on its side. Make sure the ground is level and free of debris. Once the bike is stable, use the appropriate tools to loosen and remove the axle nut, brake caliper, and any other components that may be in the way. Once all the components are removed, you can proceed to the next step.
Removing the Old Tire
Now it’s time to remove the old tire. Start by loosening the rim lock, then use the tire lever to break the bead of the tire from the rim. Use the tire lever to work your way around the tire until it is fully off the rim. Once the tire is off the rim, you can move on to the next step.
Installing the New Tire
Now it’s time to install the new tire. Start by lubricating the inside of the tire and the rim with tire lube. This will help you get the tire on the rim more easily. Next, use the tire lever to carefully work the tire onto the rim. Once the tire is on the rim, use the tire lever to work your way around the tire until it is fully seated on the rim. Finally, reinstall all the components that were removed earlier and tighten the axle nut.
Final Check
Once the tire is installed, it’s important to do a final check to make sure everything is tight and secure. Make sure the axle nut is tightened properly, the brakes are working correctly, and there are no leaks. If everything looks good, you’re ready to hit the trails!
Video Tutorial
For those of you who prefer visual instruction, here is a video tutorial to help you learn how to change a tire on a dirt bike:
List of Tools Needed
Here is a list of tools you’ll need to change a tire on a dirt bike:
- Tire lever
- Tire lube
- Rim lock
- Socket wrench
- Axle nut
- Brake caliper
Safety Tips
When changing a tire on a dirt bike, it’s important to follow some basic safety tips:
Wear Protective Gear
Make sure you wear protective gear when working on your bike. This includes gloves, safety glasses, and a helmet.
Make Sure the Bike is Stable
Make sure the bike is stable before you start working on it. Place it on a stand or lay it down on its side on a level surface.
Use the Correct Tools
It’s important to use the correct tools for the job. Make sure you have the right size socket wrench, axle nut, and tire lever for your bike.
FAQs
Here are some common questions about changing a tire on a dirt bike:
- Q: How often should I change my tire?
- A: It depends on how much you ride and the type of terrain you ride on. Generally, you should change your tire at least once a year or when the tread wears down.
- Q: Do I need to buy a new tire every time I change one?
- A: No, you can use a patch kit to repair small punctures or tears in the tire. However, if the damage is too severe, you will need to purchase a new tire.
- Q: What type of tire should I buy?
- A: It depends on the type of riding you do. Soft terrain tires are best for mud and sand, while hard terrain tires are better for rocky and rooty trails. Consult your local bike shop for more advice.
Troubleshooting Guide
If you encounter any problems while trying to change a tire on your dirt bike, here are some common issues and their solutions:
Common Problems
- Tire won’t come off the rim
- Tire won’t stay on the rim
- Axle nut won’t stay tight
- Brake caliper won’t fit
Solutions
- Make sure the rim lock is loose enough to allow the tire to be removed. If the tire is still stuck, try using a tire lever to break the bead of the tire.
- Make sure you are using enough tire lube to lubricate the inside of the tire and the rim. Also, make sure the tire is completely seated on the rim before tightening the rim lock.
- Make sure the axle nut is tightened properly. If it is still coming loose, try using a thread locking compound on the threads.
- Make sure the brake caliper is the correct size for your bike. If it is too large, you may need to purchase a smaller caliper.
Conclusion
Changing a tire on a dirt bike is an essential skill for any rider. With the help of this step-by-step guide, a video tutorial, and a list of tools needed, you should now have the knowledge and confidence to change a tire on your own dirt bike. Just remember to always practice safety when working on your bike and consult a professional if you ever run into any problems.