
Introduction
A dryer’s heating element is responsible for providing the heat needed to dry clothes during the drying cycle. Without a functioning heating element, your dryer will not be able to properly dry the clothes. If your dryer isn’t producing enough heat or is taking too long to dry clothes, then it may be time to replace the heating element.
Step-by-Step Guide on How to Change a Dryer Heating Element
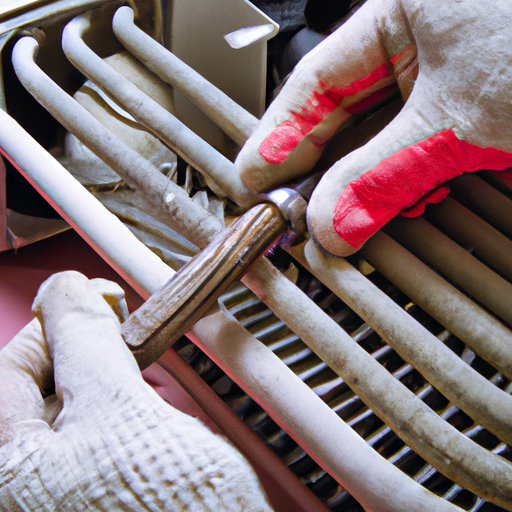
Changing a dryer’s heating element is a relatively simple process that can be completed in a few steps. Before you begin, make sure to put on protective gloves and eyewear to protect yourself from any potential hazards. Additionally, make sure to unplug the dryer before performing any repairs.
Safety Precautions
Before beginning any repairs on a dryer, it’s important to take the proper safety precautions. Make sure to wear protective gloves and eyewear to protect yourself from any potential hazards. Additionally, unplug the dryer before performing any repairs.
Tools Needed
In order to successfully change a dryer’s heating element, you’ll need a few basic tools. These include a Phillips screwdriver, pliers, a socket wrench, and a wire crimper. It’s also a good idea to have some extra wire just in case.
Removing the Old Heating Element
Once you’ve gathered the necessary tools and taken the appropriate safety precautions, you can begin the process of removing the old heating element. Start by locating the heating element, which can be found behind the front panel of the dryer. Once you’ve located the heating element, use a Phillips screwdriver to remove the screws holding it in place. Then, use pliers to carefully disconnect the wiring from the heating element. Finally, use a socket wrench to remove the screws holding the heating element in place.

Installing the New Heating Element
Once the old heating element has been removed, you can begin installing the new one. Start by connecting the new heating element to the wiring. Use a wire crimper to secure the connection. Then, use a socket wrench to attach the new heating element to the dryer. Finally, reinstall the front panel and use a Phillips screwdriver to secure the screws.

Troubleshooting a Broken Dryer Heating Element and Replacing It
If your dryer’s heating element is broken, it’s important to identify the problem before attempting to replace it. Common problems include a burnt-out heating element, faulty wiring, or a broken thermostat. Once you’ve identified the problem, you can find the right replacement part for your dryer. Make sure to check the manufacturer’s website for the proper part number. Once you’ve obtained the new part, follow the steps outlined above to install it.

A Comprehensive Guide on Replacing the Heating Element in Your Dryer
When replacing the heating element in your dryer, it’s important to understand the different types of heating elements available. There are two main types of heating elements: coil and ceramic. Coil heating elements are the most common type, while ceramic heating elements are more efficient but more expensive. Once you’ve determined the type of heating element your dryer requires, you can begin the process of diagnosing the problem and finding the right replacement part.
Understanding the Different Types of Heating Elements
The two main types of heating elements are coil and ceramic. Coil heating elements are the most common type and are typically made of metal coils wrapped around a metal core. Ceramic heating elements are more efficient than coil elements, but they are also more expensive. When selecting a replacement heating element, make sure to choose one that is compatible with your dryer model.
Diagnosing the Problem
Before replacing the heating element in your dryer, it’s important to diagnose the problem. Common problems include a burnt-out heating element, faulty wiring, or a broken thermostat. If you’re unsure of the cause of the problem, it’s best to contact a qualified technician who can help you diagnose and repair the issue.
Choosing the Right Replacement Heating Element
Once you’ve diagnosed the problem, you can begin the process of finding the right replacement part. Make sure to check the manufacturer’s website for the proper part number. If you’re unable to find the part number, you can contact the manufacturer directly to obtain the correct part.
Making the Repairs
Once you’ve obtained the new part, you can begin the process of making the repairs. Follow the steps outlined above to remove the old heating element and install the new one. Make sure to take the necessary safety precautions and double-check all connections before powering up the dryer.
Tips for Proper Installation
When installing a new heating element, it’s important to follow the instructions provided by the manufacturer. Additionally, make sure to double-check all connections before powering up the dryer. If the element isn’t properly installed, it could cause a fire or other electrical issues.
Testing the Heating Element
Once the new heating element is installed, you can test it to make sure it’s working properly. Start the dryer and let it run for several minutes. If the heating element is working properly, the dryer should be producing heat. If the dryer is still not producing enough heat, then it’s possible that the heating element was not installed correctly.
DIY Dryer Repair: Replacing the Heating Element
Replacing a dryer’s heating element is a relatively straightforward process that can be completed in a few simple steps. Gather the necessary supplies, shut off the power, remove the front panel, access the heating element, disconnect the wiring, remove the old heating element, install the new heating element, reconnect the wiring, and test the heating element. With these steps and the right tools, you can easily replace the heating element in your dryer.

Everything You Need to Know About Replacing a Dryer Heating Element
Replacing a dryer’s heating element is a relatively simple process that can be completed in a few steps. First, you need to determine the type of heating element your dryer requires. Then, you need to troubleshoot the problem and find the right replacement part. Next, you need to make the repairs and install the new heating element. Finally, you need to test the heating element to make sure it’s working properly. By following these steps and taking the necessary safety precautions, you can easily replace the heating element in your dryer.
Conclusion
Replacing a dryer’s heating element is a relatively simple process that can be done in a few steps. Make sure to gather the necessary supplies, shut off the power, remove the front panel, access the heating element, disconnect the wiring, remove the old heating element, install the new heating element, reconnect the wiring, and test the heating element. With these steps and the right tools, you can easily replace the heating element in your dryer.