
Introduction
Replacing a bike chain is a fairly straightforward process that can be completed in just a few steps. If you’re new to cycling or just need a refresher, this article will provide you with the necessary information to get the job done quickly and efficiently. We’ll explain the basics of bike chains and what tools you need, as well as provide an illustrated guide to help make the process easier.
Background on Bike Chains
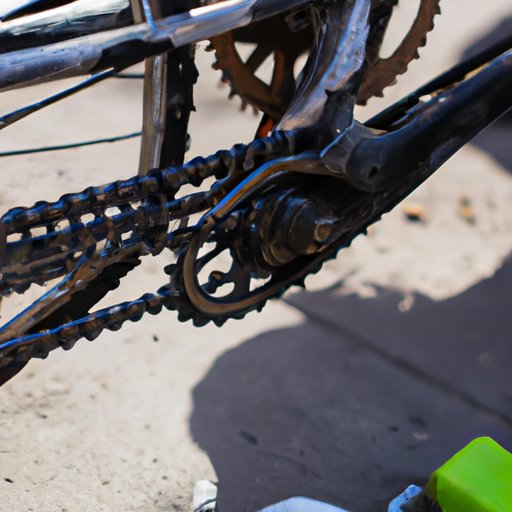
A bike chain consists of two rows of metal links that are connected together in a loop. The links are held together by pins or rivets, which allow them to move freely when the pedals are turned. The chain is an integral part of the bike, as it transfers power from the pedals to the rear wheel. Over time, these chains wear out and must be replaced in order for the bike to run smoothly.
Step-by-Step Guide to Replacing a Bike Chain
Before replacing your bike chain, you’ll need to gather the necessary tools and supplies. These include a chain break tool, chain pin extractor, measuring tape, and lube. You may also need a rag and some WD-40 if the chain is particularly dirty.
Once you have all the necessary tools and supplies, you’re ready to start the process. Begin by removing the old chain. This is done by using the chain break tool to push out the pins connecting the links. Then, carefully remove the chain from the drivetrain. Once the old chain is removed, it’s time to install the new one.
To install the new chain, begin by feeding it through the derailleur and around the chainring. Then, use the chain pin extractor to push the pins back into the links. Finally, use the chain break tool to secure the pins in place. When you’re finished, the chain should be snug but not too tight.
Now that the new chain is installed, it’s time to clean and lubricate it. This helps to keep the chain from rusting and makes it easier to shift gears. Use a rag to wipe off any dirt and grime, then apply a thin layer of lube to the entire length of the chain. Once the chain is clean and lubricated, check for proper tension and alignment.

How to Change a Bike Chain in 5 Easy Steps
If you’re a beginner and want to know how to replace your bike chain, here’s a simple five-step guide to get you started.
Step 1: Gather the necessary tools and supplies. Before beginning the process, you’ll need to have a chain break tool, chain pin extractor, measuring tape, and lube. You may also need a rag and some WD-40 if the chain is particularly dirty.
Step 2: Remove the old chain. Use the chain break tool to push out the pins connecting the links, then carefully remove the chain from the drivetrain.
Step 3: Install the new chain. Feed the new chain through the derailleur and around the chainring, then use the chain pin extractor to push the pins back into the links. Finally, use the chain break tool to secure the pins in place.
Step 4: Clean and lubricate the chain. Wipe off any dirt and grime, then apply a thin layer of lube to the entire length of the chain.
Step 5: Check for proper tension and alignment. The chain should be snug but not too tight. Make sure the links are properly aligned and that the chain isn’t rubbing against any other parts of the bike.
A Beginner’s Guide to Installing a New Bike Chain
If you’re new to cycling, you may be wondering how to identify the type of chain you need. Start by measuring the chain length. Most chains come in lengths of 84, 88, 92, 96, and 100 links. Next, you’ll need to connect the chain links. This is done by pushing the pin out of one link and inserting it into the other. Finally, secure the master link. This is the link that holds the two ends of the chain together.

The Essential Tools and Techniques for Replacing Your Bike Chain
In order to successfully replace your bike chain, you’ll need a few basic tools. These include a pair of pliers, a chain break tool, a chain pin extractor, and a measuring tape. A chain break tool is used to push out the pins connecting the links, while a chain pin extractor is used to push the pins back in. Lastly, a measuring tape is used to measure the chain length.
Changing Your Bike Chain: What You Need to Know
There are many benefits to replacing your bike chain. For starters, it increases the life of the drivetrain components and helps to maintain optimal performance. Additionally, it reduces friction and noise, as well as improves shifting accuracy. Lastly, it’s much cheaper than replacing the entire drivetrain.
If you’re having trouble with your bike chain, there are a few troubleshooting tips you can try. First, check to make sure the chain is properly tensioned and aligned. Next, inspect the chain for signs of wear and tear, such as stretched links or broken pins. Finally, clean and lubricate the chain to ensure smooth operation.

An Illustrated Guide to Replacing a Bike Chain
For a more visual guide to replacing a bike chain, we’ve put together an illustrated step-by-step guide. This guide provides clear instructions and pictures to help make the process easier. Our guide covers everything from gathering the necessary tools and supplies to checking for proper tension and alignment.
Conclusion
Replacing a bike chain is a relatively easy process that anyone can do. By following the steps outlined in this article, you can easily replace your bike chain and keep your bike running smoothly. We’ve also provided an illustrated guide to help make the process easier.