
Introduction
Braiding is an art form that has been practiced for centuries. It’s an easy way to style and add texture to your hair without having to use any heat or products. Braiding can be used to create beautiful updos, add volume, or just keep hair out of your face. But before you start braiding, it’s important to understand the basics so you can create the perfect look.
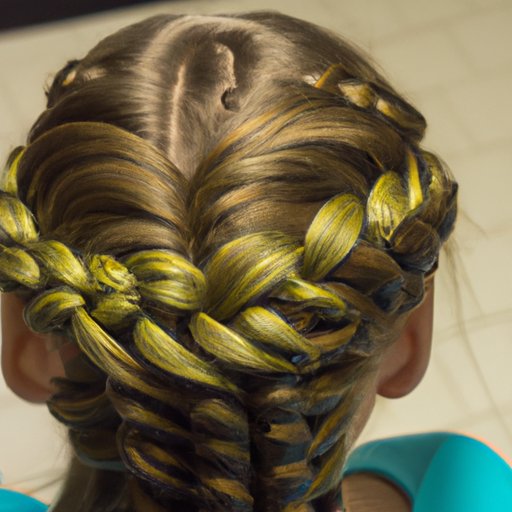
A braid, also known as a plait, is simply a section of hair that is intertwined in a particular pattern. There are many different types of braids, including the French braid, Dutch braid, three-strand braid, fishtail braid, box braid, and waterfall braid. Each of these styles has its own unique look and technique.
Braiding your hair offers several benefits. It helps to keep your hair neat and tidy, and can help reduce split ends and breakage. It also adds texture and volume, making your hair look fuller and thicker. Plus, it can be a great way to express yourself and show off your creativity.
Step-by-Step Guide to French Braiding for Beginners
The French braid is one of the most popular braiding styles. This classic look is perfect for both casual and formal occasions. Here’s a step-by-step guide on how to create a French braid.
Preparation
Before you begin, make sure your hair is clean and tangle-free. You can brush through your hair with a wide-tooth comb to ensure there are no knots or tangles. If your hair is particularly thick or curly, you may want to use some leave-in conditioner or styling product to make it easier to work with.
Getting Started
Start by parting your hair down the middle or to one side (whichever is most comfortable). Then, take a small section of hair from the front right side of your head and divide it into three equal pieces. Hold the three sections of hair between your index and middle finger.
Creating the French Braid
Now it’s time to begin braiding. Start by taking the left strand of hair and crossing it over the center strand. Then, take the right strand of hair and cross it over the new center strand. Continue this pattern until you reach the top of your head. As you braid, make sure to keep the sections tight and close together.
Once you’ve reached the top of your head, continue braiding down the other side. As you braid, add small sections of hair from the sides to each of the strands. Keep adding sections until you reach the bottom of your hair.
Finishing the Braid
Once you’ve reached the bottom of your hair, tie off the end of the braid with an elastic band. To secure the braid, you can also use a few bobby pins. Finally, spritz your hair with a light hairspray to keep everything in place.
How to Create a Dutch Braid in 5 Easy Steps
The Dutch braid is a variation of the French braid. It looks more intricate and detailed, but the technique is actually quite similar. Here’s a step-by-step guide on how to create a Dutch braid.
Preparation
Before you begin, make sure your hair is clean and tangle-free. You can brush through your hair with a wide-tooth comb to ensure there are no knots or tangles. If your hair is particularly thick or curly, you may want to use some leave-in conditioner or styling product to make it easier to work with.
Sectioning the Hair
Start by parting your hair down the middle or to one side (whichever is most comfortable). Then, take a small section of hair from the front right side of your head and divide it into three equal pieces. Make sure the sections are even and tight.
Creating the Dutch Braid
Now it’s time to begin braiding. Start by taking the left strand of hair and crossing it over the center strand. Then, take the right strand of hair and cross it under the new center strand. This is the opposite of what you would do when creating a French braid. Continue this pattern until you reach the top of your head.
As you braid, make sure to keep the sections tight and close together. You can also add small sections of hair from the sides to each of the strands as you go. Keep adding sections until you reach the bottom of your hair.
Finishing the Braid
Once you’ve reached the bottom of your hair, tie off the end of the braid with an elastic band. To secure the braid, you can also use a few bobby pins. Finally, spritz your hair with a light hairspray to keep everything in place.
Styling Tips
To give your Dutch braid an extra boost of volume, gently tug on the sections as you braid. You can also pull the braid apart slightly to make it look bigger and fuller. For a more finished look, you can wrap a piece of hair around the elastic band at the end of the braid.
The Basics of Three-Strand Braiding
The three-strand braid is one of the simplest and most classic braiding techniques. It’s perfect for those who are just starting out with braiding and want to learn the basics. Here’s a step-by-step guide on how to create a three-strand braid.
Preparation
Before you begin, make sure your hair is clean and tangle-free. You can brush through your hair with a wide-tooth comb to ensure there are no knots or tangles. If your hair is particularly thick or curly, you may want to use some leave-in conditioner or styling product to make it easier to work with.
Making the Three Strands
Start by parting your hair down the middle or to one side (whichever is most comfortable). Then, take a small section of hair from the front right side of your head and divide it into three equal pieces. Make sure the sections are even and tight.
Creating the Braid
Now it’s time to begin braiding. Start by taking the left strand of hair and crossing it over the center strand. Then, take the right strand of hair and cross it over the new center strand. Continue this pattern until you reach the bottom of your hair.
As you braid, make sure to keep the sections tight and close together. You can also add small sections of hair from the sides to each of the strands as you go. Keep adding sections until you reach the bottom of your hair.
Finishing the Braid
Once you’ve reached the bottom of your hair, tie off the end of the braid with an elastic band. To secure the braid, you can also use a few bobby pins. Finally, spritz your hair with a light hairspray to keep everything in place.

Tutorial: Achieving the Perfect Fishtail Braid
The fishtail braid is a stunning and intricate-looking braid that is surprisingly easy to create. Here’s a step-by-step guide on how to create the perfect fishtail braid.
Preparation
Before you begin, make sure your hair is clean and tangle-free. You can brush through your hair with a wide-tooth comb to ensure there are no knots or tangles. If your hair is particularly thick or curly, you may want to use some leave-in conditioner or styling product to make it easier to work with.
Separating the Hair
Start by parting your hair down the middle or to one side (whichever is most comfortable). Then, separate your hair into two sections. Make sure the sections are even and tight.
Creating the Fishtail Braid
Now it’s time to begin braiding. Start by taking a small section of hair from the outside of the left strand and crossing it over to the inside of the right strand. Then, take a small section of hair from the outside of the right strand and cross it over to the inside of the left strand. Continue this pattern until you reach the bottom of your hair.
As you braid, make sure to keep the sections tight and close together. You can also add small sections of hair from the sides to each of the strands as you go. Keep adding sections until you reach the bottom of your hair.
Finishing the Braid
Once you’ve reached the bottom of your hair, tie off the end of the braid with an elastic band. To secure the braid, you can also use a few bobby pins. Finally, spritz your hair with a light hairspray to keep everything in place.

Mastering the Art of Box Braiding
Box braids are a popular style that can be worn for days or weeks at a time. They offer a low-maintenance way to keep your hair looking stylish and chic. Here’s a step-by-step guide on how to create box braids.
Preparation
Before you begin, make sure your hair is clean and tangle-free. You can brush through your hair with a wide-tooth comb to ensure there are no knots or tangles. If your hair is particularly thick or curly, you may want to use some leave-in conditioner or styling product to make it easier to work with.
Understanding the Technique
Start by sectioning your hair into four parts. Then, begin braiding the first section of hair. To create the box braid, start at the top of the section and braid all the way down. Make sure to keep the braid tight and close to the scalp. When you reach the bottom of the section, tie off the braid with an elastic band.
Continue braiding the other three sections of hair in the same manner. Make sure to keep the braids tight and close to the scalp for a neat and polished look.
Creating the Box Braid
Once all four sections of hair have been braided, it’s time to create the box braid. Start by taking the first braid and looping it over the second braid. Then, take the third braid and loop it under the fourth braid. Make sure to keep the braids tight and close together.
Finishing the Braid
Once you’ve created the box braid, tie off the end with an elastic band. To secure the braid, you can also use a few bobby pins. Finally, spritz your hair with a light hairspray to keep everything in place.
Creating a Waterfall Braid for First-Timers
The waterfall braid is a stunning and romantic style that can be worn for special occasions or everyday wear. Here’s a step-by-step guide on how to create a waterfall braid.
Preparation
Before you begin, make sure your hair is clean and tangle-free. You can brush through your hair with a wide-tooth comb to ensure there are no knots or tangles. If your hair is particularly thick or curly, you may want to use some leave-in conditioner or styling product to make it easier to work with.
Starting the Braid
Start by parting your hair down the middle or to one side (whichever is most comfortable). Then, take a small section of hair from the front right side of your head and divide it into three equal pieces. Make sure the sections are even and tight.
Now it’s time to begin braiding. Start by taking the left strand of hair and crossing it over the center strand. Then, take the right strand of hair and cross it over the new center strand. Continue this pattern until you reach the top of your head.
Adding Sections
Once you’ve reached the top of your head, start adding sections of hair from the sides to each of the strands. As you braid, make sure to keep the sections tight and close together. You can also let go of the strand of hair that you started with and add a new section of hair to replace it.
Continue braiding down the other side of your head, adding sections of hair as you go. Keep adding sections until you reach the bottom of your hair.
Finishing the Braid
Once you’ve reached the bottom of your hair, tie off the end of the braid with an elastic band. To secure the braid, you can also use a few bobby pins. Finally, spritz your hair with a light hairspray to keep everything in place.

Tips for Maintaining and Styling Braids
Braids are a great way to keep your hair looking neat and stylish. But it’s important to practice proper care and maintenance to ensure your braids last as long as possible.
Proper Care and Maintenance
It’s important to keep your braids clean and moisturized. Wash your hair regularly with a gentle shampoo and conditioner. You can also use a mild, sulfate-free shampoo if your hair is particularly dry or damaged. Once you’ve washed your hair, apply a light leave-in conditioner to help keep your braids moisturized.
Tips for Styling Your Braids
To add a bit of volume and texture to your braids, try using some lightweight styling mousse.