
Introduction
Balayage is a popular hair coloring technique that has been around since the 1970s. It involves painting highlights onto sections of hair in an effort to create a more natural-looking finish than traditional highlighting. The result is a sun-kissed, beachy look that can be customized for each individual.
The benefits of balayage include less frequent touch-ups, softer regrowth lines, and a totally unique look every time. Plus, it’s much easier on your hair than traditional highlighting! If you’re interested in trying out balayage coloring for yourself, read on to learn all about the step-by-step process.
Step-by-Step Guide to Balayage Hair Coloring
Coloring your hair at home can be intimidating, but with the right instructions, anyone can achieve salon-worthy results. Here’s a step-by-step guide to balayage hair coloring so you can get the look you want without ever having to leave your house.
Preparation
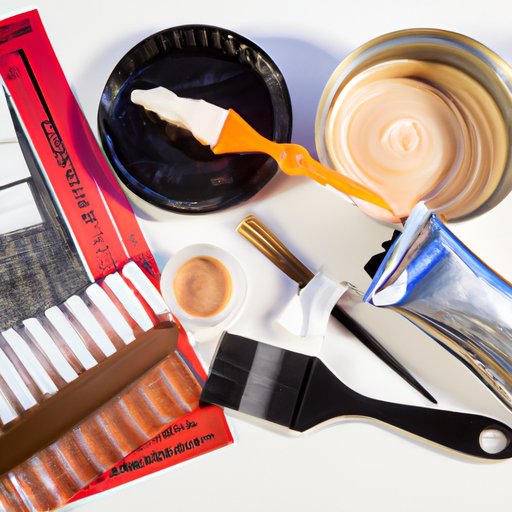
Before you start coloring your hair, you’ll need to make sure you have all the necessary materials. Gather your professional-grade dye, hair clips, bowls and brushes, protective gloves, and any other supplies you may need. You should also make sure your hair is clean and free of any product buildup or residue.
Application
Once you’ve gathered your supplies, you’re ready to begin applying the dye. Start by sectioning off the areas of your hair where you want to apply the color. Make sure each section is thin enough that you can easily paint on the color. Then, use your brush and bowl to mix the dye according to the manufacturer’s instructions.
Once the dye is ready, use your brush to apply it to the sections of hair you’ve chosen. Make sure to work in thin layers and blend the color into your natural shade for a seamless finish. Don’t forget to work in small sections and to keep the color away from your scalp.
Finishing Touches
Once you’ve applied the color, let it sit for the recommended amount of time before rinsing it out. When you’re done, use a deep conditioning treatment to nourish your hair and help lock in the color. Finish off with a styling product, like a texturizing spray, to give your hair extra body and shine.
Tips for Achieving a Natural-Looking Balayage
Achieving a natural-looking balayage requires a bit of finesse and attention to detail. Here are some tips to keep in mind when coloring your hair at home:
- Choose the right color: Make sure to choose a color that’s close to your natural shade. Going too light or too dark will result in an unnatural-looking finish.
- Use the proper tools: Invest in quality tools and supplies to ensure the best results. Professional-grade dyes and brushes will give you the most natural-looking finish.
- Apply the color in thin sections: Applying the color in thin sections will help you achieve a blended, natural-looking finish.

Pros and Cons of Balayage vs Traditional Highlighting
Balayage and traditional highlighting both offer unique benefits and drawbacks. Here’s a breakdown of the pros and cons of each method:
Pros of Balayage
- Less frequent touch-ups
- Softer regrowth lines
- Unique look every time
- Much easier on the hair than traditional highlighting
Cons of Balayage
- More expensive than traditional highlighting
- Requires more skill to achieve a natural-looking finish
- Can be difficult to correct if mistakes are made
Pros of Traditional Highlighting
- Cheaper than balayage
- Easier to achieve a uniform look
- Easier to correct mistakes
Cons of Traditional Highlighting
- More frequent touch-ups
- Harsher regrowth lines
- Less natural-looking than balayage
- More damaging to the hair

How to Choose the Right Shade for Your Balayage
Choosing the right shade for your balayage can be tricky. To ensure you get the look you want, here are a few things to consider:
- Consider your natural hair color: Start by looking at your natural hair color and deciding what kind of effect you want to achieve. Do you want to go lighter or darker? Warmer or cooler?
- Determine the effect you want to achieve: Once you know what kind of effect you’d like to achieve, start looking at swatches and pictures to get an idea of what colors would work best for you.
- Talk to a professional: If you’re still unsure, don’t hesitate to talk to a professional. They can help you pick out the perfect shade for your unique hair color and desired effect.
Essential Tools and Supplies for Balayage
To achieve the best possible results, you’ll need the right tools and supplies. Here’s a list of essential items you’ll need for a successful balayage:
- Professional-grade dye
- Hair clips
- Bowls and brushes
- Protective gloves

DIY Balayage Tutorial for Beginners
If you’re new to balayage coloring, don’t worry—it’s easy to learn! Here’s a simple tutorial to help you get started:
Sectioning the Hair
Start by sectioning off the areas of your hair where you want to apply the color. Make sure each section is thin enough that you can easily paint on the color.
Applying the Dye
Next, use your brush and bowl to mix the dye according to the manufacturer’s instructions. Once the dye is ready, use your brush to apply it to the sections of hair you’ve chosen. Make sure to work in thin layers and blend the color into your natural shade for a seamless finish.
Final Touches
Let the dye sit for the recommended amount of time before rinsing it out. When you’re done, use a deep conditioning treatment to nourish your hair and help lock in the color. Finish off with a styling product, like a texturizing spray, to give your hair extra body and shine.
Conclusion
With the right instructions and supplies, anyone can achieve salon-worthy results when balayage their hair at home. Remember to choose the right color, use the proper tools, and apply the color in thin sections for the most natural-looking finish.