
Introduction
Disc brakes are one of the most important components of a bike, as they provide the stopping power needed to keep you safe on the road or trails. Knowing how to adjust bike disc brakes is an essential skill for any cyclist, as it can ensure that your brakes are working properly and that they’ll be ready when you need them most. In this article, we’ll explore why adjusting bike disc brakes is important, provide a step-by-step guide to do it yourself, and offer troubleshooting tips and DIY maintenance advice.
Why is Adjusting Bike Disc Brakes Important?
Bike disc brakes are a type of braking system that uses hydraulic pressure to stop the bike. This makes them more reliable and powerful than traditional rim brakes. However, since disc brakes rely on hydraulic pressure, they need to be adjusted regularly in order to ensure that they’re working properly. If your brakes are not properly adjusted, they may not stop quickly enough or they may squeal when applied. Regular adjustments can help keep your brakes in top condition and ensure that they’re ready when you need them.
Step-by-Step Guide to Adjusting Bike Disc Brakes
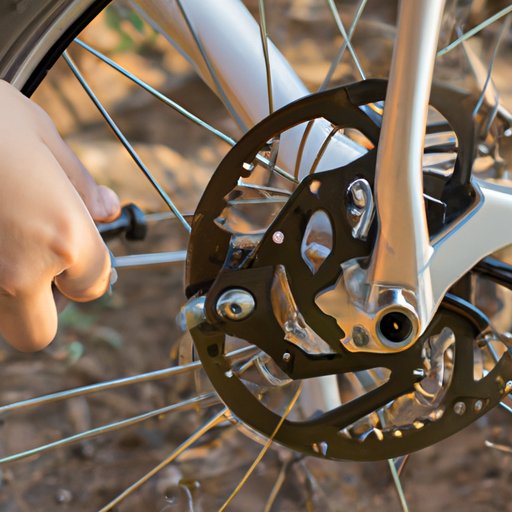
Adjusting bike disc brakes is not a difficult task and can be done at home. All you need is the right tools and some basic mechanical knowledge. Here’s a step-by-step guide to adjusting your bike disc brakes:
1. Gather the necessary tools: You’ll need an adjustable wrench, a Phillips screwdriver, and a pair of needle nose pliers. Make sure you have all of these items before starting the adjustment process.
2. Remove wheel and inspect brake pads: To begin the adjustment process, you’ll need to remove the wheel from the bike frame and inspect the brake pads. Look for signs of wear and tear, such as cracking or splitting. If the brake pads need to be replaced, do so before continuing.
3. Adjust the caliper position: Once the wheel has been removed, you can adjust the caliper position. This involves loosening the bolts that hold the caliper in place and then adjusting the position of the caliper until it’s centered over the rotor. Tighten the bolts once the caliper is in place.
4. Reset the cable tension: The next step is to reset the cable tension. This involves loosening the cable at the lever, moving the lever to the closed position, and then tightening the cable again. Make sure the cable is tight but not too tight.
5. Test the brakes: Once the cable tension has been adjusted, you can test the brakes by applying pressure to the lever. The brakes should engage smoothly and without any squeaking or grinding noises. If the brakes don’t seem to be working properly, repeat the steps above until they do.

Troubleshooting Tips for Adjusting Bike Disc Brakes
If you’ve followed the steps above and your brakes still aren’t working properly, there are a few troubleshooting tips you can try. First, inspect the brake pads for signs of wear and tear. If the pads are worn out, replace them. Next, check the caliper alignment. If the caliper is misaligned, adjust it until it’s centered over the rotor. Finally, adjust the cable tension. Make sure the cable is tight but not too tight. If all else fails, take your bike to a professional mechanic for further assistance.
How to Diagnose & Fix Common Bike Disc Brake Issues
There are a few common issues that can occur with bike disc brakes. These include squealing brakes, weak or spongy brakes, uneven pad wear, and brakes rubbing against the rim. To diagnose and fix these issues, start by inspecting the brake pads for signs of wear and tear. If necessary, replace the pads. Next, check the caliper alignment and adjust if needed. Finally, adjust the cable tension and test the brakes. If the issue persists, take your bike to a professional mechanic for further assistance.
A Beginner’s Guide to Setting Up Your Bike Disc Brakes
If you’re new to bike disc brakes, there are a few steps you should take before attempting to adjust them. First, identify the type of brakes you have. There are two main types of disc brakes: mechanical and hydraulic. Mechanical brakes use a cable to transfer the force from the brake lever to the caliper, while hydraulic brakes use fluid to transfer the force. Once you’ve identified the type of brakes you have, familiarize yourself with the components and how they work together. Then, follow the step-by-step guide above to adjust your brakes. Finally, test the brakes to make sure they’re working properly.
DIY Maintenance: Adjusting Your Bike Disc Brakes
In addition to regular adjustments, you should also schedule regular maintenance for your bike disc brakes. This includes replacing worn out parts, lubricating moving parts, and testing the brakes. Replacing worn out parts is especially important, as worn out parts can cause your brakes to fail. Lubricating moving parts can help reduce friction and improve braking performance. Finally, testing your brakes after each adjustment and maintenance session will help ensure that they’re functioning properly.

The Ultimate Guide to Adjusting Bike Disc Brakes
Adjusting bike disc brakes is an important skill for any cyclist. Not only does it ensure that your brakes are working properly, but it can also help keep you safe on the road or trails. This guide provides a step-by-step guide to adjusting bike disc brakes, as well as troubleshooting tips and DIY maintenance advice. Whether you’re a beginner or an experienced rider, following this guide will help ensure that your brakes are always in top condition and ready when you need them most.