
Introduction
Installing a bathroom sink can be a daunting task for the average homeowner, but with a little bit of research and preparation, it can be done with relative ease. This article will provide a step-by-step guide to installing a bathroom sink, as well as some helpful DIY tips to ensure success.
Step-by-Step Guide to Installing a Bathroom Sink
The process of installing a bathroom sink can be broken down into several steps that should be followed in order to ensure a successful installation. The following is a step-by-step guide to installing a bathroom sink:
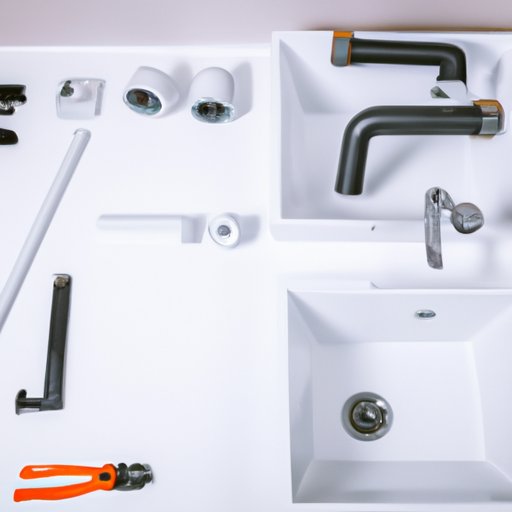
1. Gather necessary supplies and materials. Before beginning the installation process, it is important to make sure that all of the necessary supplies and materials are on hand. Depending on the type of sink being installed, this may include a drain assembly, plumbing supplies, sealant, and tools.
2. Prepare the area. Before installing the sink, it is important to make sure that the area is clean and free of debris. This will help ensure that the installation process goes smoothly and that there are no surprises along the way.
3. Install the sink drain. Once the area is prepared, the next step is to install the sink drain. This will involve attaching the drain assembly to the sink and then securing it to the wall or floor.
4. Connect the sink to the water supply lines. After the drain is installed, the next step is to connect the sink to the water supply lines. This will require connecting the hot and cold water lines to the appropriate valves on the sink.
5. Secure the sink to the countertop. Once the sink is connected to the water supply lines, the next step is to secure the sink to the countertop. This will involve using screws and washers to attach the sink to the countertop.
6. Install the faucets and handles. After the sink is secured to the countertop, the next step is to install the faucets and handles. This will involve attaching the faucets and handles to the sink and then securing them with nuts and washers.
7. Test the sink. After the faucets and handles are installed, the next step is to test the sink. This will involve turning on the water and checking for any leaks or other issues.

DIY: Installing a Bathroom Sink From Scratch
For those who would like to take on the challenge of installing a bathroom sink from scratch, there are a few steps that must be taken. The following is an overview of the steps involved in installing a bathroom sink from scratch:
1. Identify the parts of the sink. Before beginning the installation process, it is important to identify the various parts of the sink. This will involve identifying the drain assembly, faucet, handles, and any other parts that may be included.
2. Measure the space for the sink. After the parts of the sink have been identified, the next step is to measure the space for the sink. This will involve measuring the length, width, and depth of the sink so that it can fit properly.
3. Assemble the sink components. Once the area has been measured, the next step is to assemble the sink components. This will involve connecting the drain assembly to the sink and then connecting the faucets and handles.
4. Attach the sink to the countertop. After the sink components are assembled, the next step is to attach the sink to the countertop. This will involve using screws and washers to secure the sink to the countertop.
5. Connect the sink to the water supply. After the sink is attached to the countertop, the next step is to connect the sink to the water supply. This will involve connecting the hot and cold water lines to the appropriate valves on the sink.
6. Install the drain. After the sink is connected to the water supply, the next step is to install the drain. This will involve attaching the drain assembly to the sink and then securing it to the wall or floor.
7. Seal the sink. After the drain is installed, the next step is to seal the sink. This will involve applying a sealant around the edges of the sink to ensure that it is watertight.
An Easy Guide to Installing a Bathroom Sink
For those who are looking for an easy guide to installing a bathroom sink, the following steps should be taken:
1. Choose the right type of sink. The first step in installing a bathroom sink is to choose the right type of sink. This will involve considering the size and shape of the sink, as well as the type of material it is made of.
2. Measure the area for the sink. After the type of sink has been chosen, the next step is to measure the area for the sink. This will involve measuring the length, width, and depth of the sink so that it can fit properly.
3. Install the drain assembly. Once the area has been measured, the next step is to install the drain assembly. This will involve attaching the drain assembly to the sink and then securing it to the wall or floor.
4. Connect the sink to the water supply lines. After the drain is installed, the next step is to connect the sink to the water supply lines. This will require connecting the hot and cold water lines to the appropriate valves on the sink.
5. Secure the sink to the countertop. Once the sink is connected to the water supply lines, the next step is to secure the sink to the countertop. This will involve using screws and washers to attach the sink to the countertop.
6. Install the faucets and handles. After the sink is secured to the countertop, the next step is to install the faucets and handles. This will involve attaching the faucets and handles to the sink and then securing them with nuts and washers.
7. Test the sink. After the faucets and handles are installed, the next step is to test the sink. This will involve turning on the water and checking for any leaks or other issues.

How to Install a Bathroom Sink in 10 Steps
Installing a bathroom sink can be accomplished in 10 simple steps. The following is a step-by-step guide to installing a bathroom sink in 10 steps:
1. Gather all necessary supplies. Before beginning the installation process, it is important to make sure that all of the necessary supplies and materials are on hand. Depending on the type of sink being installed, this may include a drain assembly, plumbing supplies, sealant, and tools.
2. Prepare the area. Before installing the sink, it is important to make sure that the area is clean and free of debris. This will help ensure that the installation process goes smoothly and that there are no surprises along the way.
3. Install the drain assembly. Once the area is prepared, the next step is to install the sink drain. This will involve attaching the drain assembly to the sink and then securing it to the wall or floor.
4. Connect the sink to the water supply lines. After the drain is installed, the next step is to connect the sink to the water supply lines. This will require connecting the hot and cold water lines to the appropriate valves on the sink.
5. Secure the sink to the countertop. Once the sink is connected to the water supply lines, the next step is to secure the sink to the countertop. This will involve using screws and washers to attach the sink to the countertop.
6. Install the faucets and handles. After the sink is secured to the countertop, the next step is to install the faucets and handles. This will involve attaching the faucets and handles to the sink and then securing them with nuts and washers.
7. Test the sink. After the faucets and handles are installed, the next step is to test the sink. This will involve turning on the water and checking for any leaks or other issues.

What You Need to Know Before Installing a Bathroom Sink
Before beginning the installation process, it is important to be aware of a few key factors. The following is an overview of what you need to know before installing a bathroom sink:
1. Types of sinks available. It is important to be aware of the different types of sinks that are available, as this will help to determine which type of sink is best suited for the space.
2. Tools and supplies needed. Before beginning the installation process, it is important to make sure that all of the necessary tools and supplies are on hand. This may include a drain assembly, plumbing supplies, sealant, and tools.
3. Necessary measurements. In order to ensure that the sink fits properly, it is important to take the necessary measurements. This will involve measuring the length, width, and depth of the sink so that it can fit properly.
4. Local building codes. It is also important to be aware of any local building codes that may apply to the installation process. This will help to ensure that all of the necessary steps are taken and that the installation is done safely and correctly.
The Basics of Installing a Bathroom Sink
Once the necessary information is gathered and the area is prepared, the following steps should be taken to install a bathroom sink:
1. Remove existing sink. If there is an existing sink, it should be removed before beginning the installation process. This will involve disconnecting the drain and water supply lines, as well as removing any screws or clips that may be holding the sink in place.
2. Measure the area for the new sink. Once the existing sink is removed, the next step is to measure the area for the new sink. This will involve measuring the length, width, and depth of the sink so that it can fit properly.
3. Install the drain assembly. After the area has been measured, the next step is to install the drain assembly. This will involve attaching the drain assembly to the sink and then securing it to the wall or floor.
4. Connect the sink to the water supply lines. After the drain is installed, the next step is to connect the sink to the water supply lines. This will require connecting the hot and cold water lines to the appropriate valves on the sink.
5. Secure the sink to the countertop. Once the sink is connected to the water supply lines, the next step is to secure the sink to the countertop. This will involve using screws and washers to attach the sink to the countertop.
6. Install the faucets and handles. After the sink is secured to the countertop, the next step is to install the faucets and handles. This will involve attaching the faucets and handles to the sink and then securing them with nuts and washers.
7. Test the sink. After the faucets and handles are installed, the next step is to test the sink. This will involve turning on the water and checking for any leaks or other issues.
A Beginner’s Guide to Installing a Bathroom Sink
For those who are just starting out, the following steps should be taken when installing a bathroom sink:
1. Gather all necessary supplies. Before beginning the installation process, it is important to make sure that all of the necessary supplies and materials are on hand. Depending on the type of sink being installed, this may include a drain assembly, plumbing supplies, sealant, and tools.
2. Prepare the area. Before installing the sink, it is important to make sure that the area is clean and free of debris. This will help ensure that the installation process goes smoothly and that there are no surprises along the way.
3. Remove the existing sink. If there is an existing sink, it should be removed before beginning the installation process. This will involve disconnecting the drain and water supply lines, as well as removing any screws or clips that may be holding the sink in place.
4. Measure the area for the new sink. Once the existing sink is removed, the next step is to measure the area for the new sink. This will involve measuring the length, width, and depth of the sink so that it can fit properly.
5. Install the drain assembly.