
Introduction
Texturing a ceiling is a great way to add visual interest and transform a room. It’s also relatively easy to do yourself and can be a fun project. But it’s important to understand the process and what you need to know before you start. This article will give you a comprehensive guide to texturing a ceiling, from preparation to finishing touches, as well as tips on choosing the right texture, avoiding common mistakes, and creating unique patterns. Plus, discover professional techniques for achieving perfect results.
Step-by-Step Guide to Texturing a Ceiling
The following steps will help you texture your ceiling like a pro.
Preparation
Before you begin, you need to make sure the surface is clean and free of any debris. If there are any holes or cracks in the ceiling, fill them in with spackling compound. Once the compound is dry, sand it down so it’s smooth. Then wipe the surface with a damp cloth to remove all dust and debris.
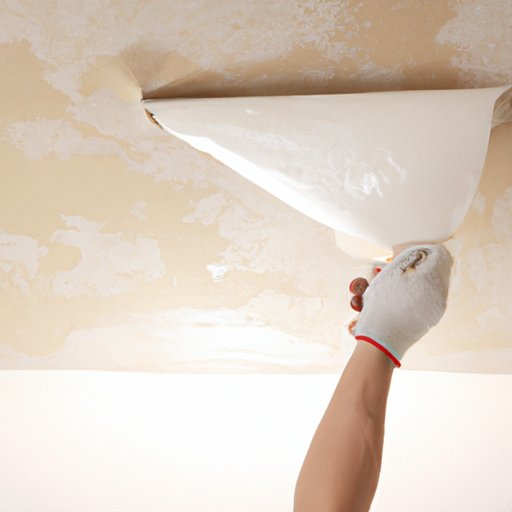
Applying Texture
Once the surface is ready, you can begin applying the texture. Start by mixing the texture material with water according to the instructions on the package. Use a paint roller to apply the texture to the ceiling in an even layer. Make sure to overlap each stroke slightly to avoid gaps. Let the texture dry completely before moving on to the next step.
Finishing Touches
When the texture has dried, you can add any finishing touches. If you want to add color, you can use a spray gun to apply a coat of paint to the ceiling. Alternatively, you can use a brush and roller to apply the paint. Once the paint is dry, you’re done!

DIY Tips for Perfectly Textured Ceilings
These simple tips will help ensure that your textured ceiling looks perfect every time.
Choosing the Right Tools
Using the right tools is key to achieving professional results. Make sure you have a good quality paint roller, brushes, and spackling compound. You may also need a spray gun if you plan to add color.
Preparing the Surface
It’s important to prepare the surface properly before you start. Fill in any holes or cracks with spackling compound and let it dry completely before sanding it down. Wipe the surface with a damp cloth to remove any dust and debris.
Applying the Texture
Mix the texture material with water according to the instructions on the package. Use a paint roller to apply the texture to the ceiling in an even layer. Make sure to overlap each stroke slightly to avoid gaps. Let the texture dry completely before moving on to the next step.
Finishing Up
Once the texture has dried, you can finish up by adding any desired details. You can use a spray gun to apply a coat of paint or use a brush and roller to apply the paint. Once the paint is dry, your textured ceiling is complete!
What You Need to Know Before Texturing a Ceiling
Before you start texturing a ceiling, it’s important to be aware of some safety precautions and common mistakes to avoid.
Safety Precautions
Texturing a ceiling can be a messy job, so it’s important to take safety precautions. Wear protective clothing such as goggles, gloves, and a dust mask to protect yourself from any airborne particles. It’s also a good idea to cover any furniture or flooring in the area to prevent damage.
Common Mistakes to Avoid
One of the most common mistakes people make when texturing a ceiling is not mixing the texture material correctly. Make sure you follow the instructions carefully to ensure the texture is the correct consistency. Another mistake to avoid is not giving the texture enough time to dry. Make sure you allow the texture to dry completely before adding any finishing touches.
How to Choose the Right Texture for Your Ceiling
There are many different textures to choose from when texturing a ceiling. Here are some tips for selecting the right one for your space.
Different Types of Textures
The type of texture you choose will depend on the look you’re trying to achieve. Popular options include popcorn, knockdown, and orange peel. Each type of texture has its own unique characteristics, so be sure to research each option before making a decision.
Selecting a Style
Once you’ve chosen a type of texture, it’s time to select a style. Consider the existing décor in the room and choose a texture that will complement it. You can also experiment with different colors and finishes to create a unique look.

Creative Ideas for Texturing Ceilings
If you’re looking for something a little more creative, there are plenty of interesting ways to texture a ceiling. Here are some ideas to get you started.
Unique Patterns
Create a unique pattern by combining two different textures. For example, combine popcorn and knockdown textures for an interesting look. You can also try creating stripes or other geometric designs with multiple colors.
Colorful Options
Add a pop of color to your ceiling with a brightly colored texture. You can also try using multiple colors to create a rainbow effect or ombre design.

Professional Techniques for Texturing a Ceiling
For those who want to achieve perfect results, here are some professional techniques for texturing a ceiling.
Proper Setup
Make sure the area is properly set up before you start. Cover any furniture or floors with plastic sheeting to protect them from the texture. Also, make sure the surface is clean and free of any debris.
Specialized Tools
Invest in some specialized tools such as a texture gun and compressor. These tools will help you achieve professional results and save time.
Expert Advice
If you’re still unsure about how to texture a ceiling, consider hiring a professional. They will have the expertise and experience to help you achieve the perfect results.
Conclusion
Texturing a ceiling is a great way to add visual interest and transform a room. With the right tools and materials, it’s relatively easy to do yourself. This article provides a comprehensive guide to texturing a ceiling, from preparation to finishing touches, as well as tips on choosing the right texture, avoiding common mistakes, and creating unique patterns. Plus, discover professional techniques for achieving perfect results.