
Introduction
For gardeners and birdwatchers alike, a DIY bird bath is a great way to add beauty and charm to your outdoor space. Not only are bird baths attractive, but they also provide a valuable source of water for local birds. With a few basic tools and materials, you can easily create an inexpensive and attractive bird bath that will bring life and beauty to your garden.
Overview of the Benefits of Creating a DIY Bird Bath
Bird baths offer a variety of benefits for both gardeners and birds. For gardeners, bird baths provide a unique and beautiful addition to their outdoor space. They are also relatively easy to make and require minimal effort to maintain. For birds, bird baths offer a vital source of hydration and help them to remain healthy during the hot summer months. Additionally, bird baths can attract a variety of species to your garden, providing a wonderful opportunity for birdwatching.
Necessary Tools and Materials
Before you begin creating your DIY bird bath, it’s important to gather the necessary tools and materials. The most important tool you’ll need is a drill, as this will be used to make holes in the materials you’ll be using. You’ll also need a shovel, trowel, level, measuring tape, and saw. As far as materials go, you’ll need concrete mix, sand, gravel, and a shallow basin or container. You may also choose to use other items such as rocks, bricks, or plants to decorate the bird bath.

How to Create a DIY Bird Bath for Your Garden
Once you have gathered the necessary tools and materials, you can begin creating your DIY bird bath. Follow these steps to build an inexpensive and attractive bird bath:
1. Selecting the Right Spot
The first step in creating a DIY bird bath is to select the right spot in your garden. Choose a location that is close to trees and shrubs, as this will provide shelter for the birds. Make sure the spot is level and not prone to flooding or standing water. Additionally, avoid placing the bird bath in direct sunlight, as this could cause the water to overheat.
2. Preparing the Surface
Once you have chosen the perfect spot for your bird bath, you’ll need to prepare the surface. Use a shovel to remove any grass or weeds from the area and then level the ground with a trowel. Next, spread a layer of gravel over the surface to help with drainage.
3. Gathering the Supplies
Now it’s time to gather the supplies you’ll need to construct the bird bath. You’ll need to purchase concrete mix, sand, gravel, and a shallow basin or container. If you’re feeling creative, you may also choose to use other items such as rocks, bricks, or plants to decorate the bird bath.
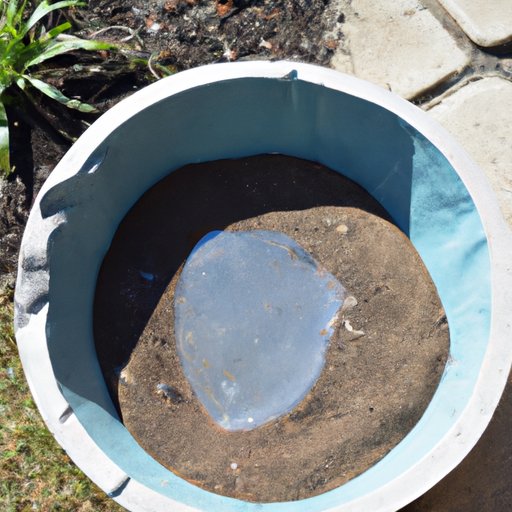
4. Constructing the Foundation
Using the concrete mix and sand, construct a foundation for the bird bath. Start by pouring the sand into the bottom of the area and then adding the concrete mix. Make sure the mixture is evenly spread and level. Once the foundation is complete, allow it to dry for 24 hours.
5. Adding the Basin
Once the foundation has dried, it’s time to add the basin. Place the basin onto the foundation and use a drill to make holes in the sides so that water can drain out. Fill the basin with water and check to make sure it is level. You can also use rocks or bricks to prop up the basin if necessary.
6. Finishing Touches
Finally, add any finishing touches to the bird bath. You can use plants, rocks, or other decorative items to make the bird bath more attractive. Make sure to keep the area around the bird bath clear of debris, as this can attract pests such as mosquitoes.

Designing a Unique and Functional DIY Bird Bath
Creating a DIY bird bath doesn’t have to be expensive or time-consuming. With a few simple tools and materials, you can easily create an attractive and functional bird bath in your garden. Additionally, you can get creative and repurpose everyday items into a beautiful bird bath. For example, you can use an old ceramic bowl, an overturned pot, or even an old tire as the basin for your bird bath.
When choosing materials for your bird bath, it’s important to select materials that are durable and long-lasting. Concrete and stone are good choices, as they are sturdy and won’t be damaged by the elements. Additionally, plastic and terracotta containers are lightweight and affordable, making them a great option for a DIY bird bath.
Conclusion
DIY bird baths are a great way to add beauty and charm to your garden while providing a valuable source of water for local birds. With a few basic tools and materials, you can easily create an inexpensive and attractive bird bath for your outdoor space. Additionally, you can get creative and repurpose everyday items into a beautiful bird bath. When selecting materials for your bird bath, make sure to choose materials that are durable and long-lasting. By following these tips, you can create a unique and functional DIY bird bath for your garden.
In summary, DIY bird baths are an affordable and attractive way to bring life and beauty to your garden. They provide a valuable source of water for local birds and can attract a variety of species to your outdoor space. To ensure that your bird bath lasts for years to come, make sure to use durable materials and perform regular maintenance and upkeep.
Final Thoughts
Creating a DIY bird bath is a rewarding and enjoyable experience. Not only will it bring life and beauty to your garden, but it will also provide a valuable source of water for local birds. With a few basic tools and materials, you can easily construct an inexpensive and attractive bird bath that will last for years to come.