
Introduction
Parting your hair is one of the most basic hairstyling techniques. It’s also one of the most important. Whether you’re creating a side part, middle part, zig-zag part, or something else entirely, knowing how to part your hair correctly can make all the difference in the world when it comes to achieving the perfect look. But don’t worry – we’ve got you covered.
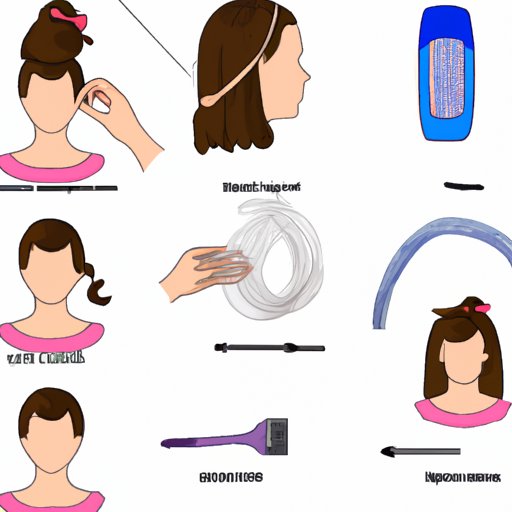
In this article, we’ll walk you through eight easy steps for perfect results. From using a comb to create a side part to utilizing bobby pins for a perfect middle part, we’ll cover everything you need to know about parting your hair.

Creating a Side Part with a Comb
A side part is a classic hairstyle that looks great on men and women alike. To create a side part with a comb, follow these simple steps:
- Start by dampening your hair with water. This will help the comb glide through your hair more easily.
- Using a wide-tooth comb, start at the front of your head and comb the hair straight back. Continue until you reach the crown of your head.
- Now switch to a fine-tooth comb and begin at the side of your head. Gently pull the comb down at a 45-degree angle, creating the desired side part.
- Continue combing the hair from the part in the same direction until you reach the back of your head.
- Finish off the style by using a blow dryer to set the part and give your hair some extra volume.
Here are a few tips for getting perfect results:
- Use a light-hold hairspray to keep the part in place.
- Be sure to use a wide-tooth comb first. This will help to detangle any knots and make the process easier.
- For a more dramatic look, try using a rat tail comb instead of a fine-tooth comb.
Finger-Parting Your Hair
If you’re looking for a more natural look, try finger-parting your hair. This technique is especially effective for curly or wavy hair types. Here’s how to do it:
- Start by wetting your hair with water. This will help the hair separate more easily.
- Using your fingers, start at the front of your head and gently pull the hair back. Continue until you reach the crown of your head.
- Now switch to the other side of your head. Using your fingers, gently pull the hair down at a 45-degree angle, creating the desired side part.
- Continue pulling the hair from the part in the same direction until you reach the back of your head.
- Finish off the style with a light-hold hairspray to keep the part in place.
Here are a few tips for getting perfect results:
- Be sure to use plenty of water to ensure the hair separates easily.
- When finger-parting, use a light touch. Too much pressure can cause the hair to break.
- For a more dramatic look, try using a rat tail comb instead of your fingers.

Using a Rat Tail Comb for an Accurate Part
If you’re looking for a precise part, then a rat tail comb is the way to go. Here’s how to do it:
- Start by wetting your hair with water. This will help the comb glide through your hair more easily.
- Using a wide-tooth comb, start at the front of your head and comb the hair straight back. Continue until you reach the crown of your head.
- Now switch to the rat tail comb and begin at the side of your head. Gently pull the comb down at a 45-degree angle, creating the desired side part.
- Continue combing the hair from the part in the same direction until you reach the back of your head.
- Finish off the style with a light-hold hairspray to keep the part in place.
Here are a few tips for getting perfect results:
- Use a light-hold hairspray to keep the part in place.
- Be sure to use a wide-tooth comb first. This will help to detangle any knots and make the process easier.
- For a more dramatic look, try using a rat tail comb instead of a fine-tooth comb.
Creating a Zig-Zag Part with a Comb
A zig-zag part is a fun way to add some interest to your look. To create a zig-zag part with a comb, follow these simple steps:
- Start by dampening your hair with water. This will help the comb glide through your hair more easily.
- Using a wide-tooth comb, start at the front of your head and comb the hair straight back. Continue until you reach the crown of your head.
- Now switch to a fine-tooth comb and begin at the side of your head. Gently pull the comb down at a 45-degree angle, creating the desired zig-zag part.
- Continue combing the hair from the part in the same direction until you reach the back of your head.
- Finish off the style by using a blow dryer to set the part and give your hair some extra volume.
Here are a few tips for getting perfect results:
- Use a light-hold hairspray to keep the part in place.
- Be sure to use a wide-tooth comb first. This will help to detangle any knots and make the process easier.
- For a more dramatic look, try using a rat tail comb instead of a fine-tooth comb.
Making a Middle Part with a Brush
A middle part is a timeless look that never goes out of style. To create a middle part with a brush, follow these simple steps:
- Start by dampening your hair with water. This will help the brush glide through your hair more easily.
- Using a wide-bristled brush, start at the front of your head and brush the hair straight back. Continue until you reach the crown of your head.
- Now switch to a finer-bristled brush and begin at the center of your head. Gently pull the brush down at a 45-degree angle, creating the desired middle part.
- Continue brushing the hair from the part in the same direction until you reach the back of your head.
- Finish off the style by using a blow dryer to set the part and give your hair some extra volume.
Here are a few tips for getting perfect results:
- Use a light-hold hairspray to keep the part in place.
- Be sure to use a wide-bristled brush first. This will help to detangle any knots and make the process easier.
- For a more dramatic look, try using a rat tail comb instead of a finer-bristled brush.
Braiding the Hair for a Natural-Looking Part
If you’re looking for a more natural-looking part, then braiding is the way to go. Here’s how to do it:
- Start by wetting your hair with water. This will help the hair separate more easily.
- Using your fingers, start at the front of your head and gently pull the hair back. Continue until you reach the crown of your head.
- Now switch to the other side of your head. Using your fingers, gently pull the hair down at a 45-degree angle, creating the desired side part.
- Continue pulling the hair from the part in the same direction until you reach the back of your head.
- Finish off the style by braiding the hair along the part line. Use a light-hold hairspray to keep the braid in place.
Here are a few tips for getting perfect results:
- Be sure to use plenty of water to ensure the hair separates easily.
- When finger-parting, use a light touch. Too much pressure can cause the hair to break.
- For a more dramatic look, try using a rat tail comb instead of your fingers.

Utilizing Bobby Pins for a Perfect Part
Bobby pins can be used to create a perfect part, no matter what type of hair you have. Here’s how to do it:
- Start by dampening your hair with water. This will help the bobby pins glide through your hair more easily.
- Using your fingers, start at the front of your head and gently pull the hair back. Continue until you reach the crown of your head.
- Now switch to the other side of your head. Using a bobby pin, gently pull the hair down at a 45-degree angle, creating the desired side part.
- Continue pulling the hair from the part in the same direction until you reach the back of your head.
- Finish off the style by using a few more bobby pins to secure the part. Use a light-hold hairspray to keep the part in place.
Here are a few tips for getting perfect results:
- Be sure to use plenty of water to ensure the bobby pins glide through the hair easily.
- When using bobby pins, use a light touch. Too much pressure can cause the hair to break.
- For a more dramatic look, try using a rat tail comb instead of bobby pins.
Conclusion
Parting your hair is a simple yet essential hairstyling technique. From using a comb to create a side part to utilizing bobby pins for a perfect middle part, there are many different ways to achieve the perfect look. We hope this article has given you the tools you need to create the perfect part every time.
To recap, here are the eight easy steps for perfect results:
- Create a side part with a comb.
- Finger-part your hair.
- Use a rat tail comb for an accurate part.
- Create a zig-zag part with a comb.
- Make a middle part with a brush.
- Braid the hair for a natural-looking part.
- Utilize bobby pins for a perfect part.
With these steps in mind, you’ll be able to create the perfect part every time.