
Introduction
A junction box is an essential part of any electrical system. It is used to contain, protect, and organize wires so that electricity can be safely and efficiently distributed throughout a home or business. Installing a junction box in the ceiling is a relatively simple process, but it must be done correctly in order to ensure the safety of everyone in the building. In this article, we will provide a step-by-step guide on how to properly install a junction box in the ceiling, as well as some tips for DIYers.
Step-by-Step Guide to Installing a Junction Box in the Ceiling
Before beginning any electrical work, it is important to make sure that power has been shut off to the area where the junction box will be installed. Once power has been turned off, it’s time to gather the necessary tools and materials: a screwdriver, wire cutters, wire strippers, pliers, a drill, a hacksaw, and a junction box.
Once all the materials have been gathered, the area around the junction box should be prepared. This includes marking the area where the box will be installed, measuring the area, and cutting a hole in the ceiling that is slightly larger than the junction box itself. The hole should be cut carefully, as any damage to the surrounding area could create a potential fire hazard.
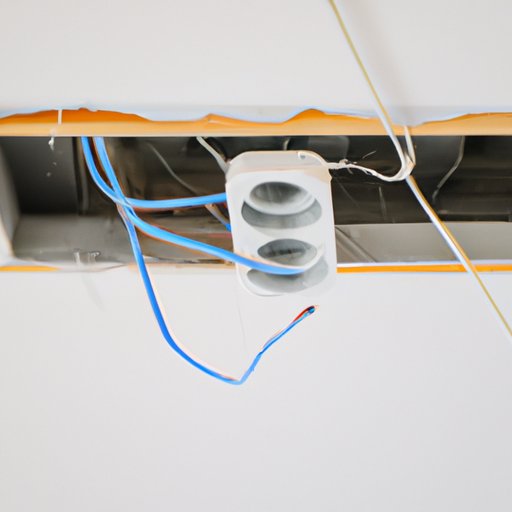
The next step is to install the junction box. Begin by threading the wires through the hole in the ceiling and into the junction box. Make sure that the wires are long enough to reach the back of the box, but not so long that they become tangled. Once the wires have been threaded into the box, the box should be secured to the ceiling using screws.
The final step is to connect the wires to the junction box. This is done by stripping the ends of the wires and connecting them to the appropriate terminals within the box. The connections should be secure and tight, and once complete, the cover of the junction box should be put back on and secured.

How to Safely Install a Junction Box in Your Ceiling
When installing a junction box in the ceiling, it is important to take all necessary precautions to ensure safety. Before beginning any electrical work, always turn off the power to the area where the box will be installed. It is also important to use the right tools for the job, as using the wrong tools can lead to injury or even death.
When working with electricity, it is important to exercise extreme caution. Never touch any exposed wires or terminals, and always wear protective gear such as rubber gloves, safety glasses, and a face mask. Finally, be sure to double check all connections before restoring power to the area.
An Easy Way to Install a Junction Box in Your Home’s Ceiling
When installing a junction box in the ceiling, it is important to choose the right location. The box should be placed at least 18 inches away from other boxes, and it should be easily accessible for maintenance and repairs. Once the location has been determined, the next step is to make sure the box fits. Measure the hole in the ceiling and compare it to the size of the junction box. If the hole is too small, it can be enlarged with a drill or a hacksaw.
Once the box is in place, it needs to be securely fastened to the ceiling. This can be done with screws, nails, or a combination of both. Make sure the box is firmly attached to the ceiling, as any movement could cause the wires inside to become loose or damaged.

The Basics of Installing a Junction Box in the Ceiling
Before beginning any electrical work, it is important to understand the codes and regulations in your area. Local codes may require you to use specific types of junction boxes, or they may specify the type of wiring that must be used. Be sure to research and follow all applicable codes before beginning work.
When installing a junction box in the ceiling, it is important to mark and measure the area carefully. This will help ensure that the box is placed in the correct spot and that the hole is the right size. After the area has been marked, the hole should be cut with a drill or a hacksaw.
Installing a Junction Box in the Ceiling: What You Need to Know
Once the junction box is in place, the wires need to be connected correctly. This involves stripping the ends of the wires and connecting them to the appropriate terminals within the box. It is important to make sure all connections are secure and tight, and that the cover of the junction box is put back on and secured.
Finally, the junction box should be sealed with electrical tape or caulk. This will help protect the box from moisture, dust, and other debris, and will also help prevent any accidental contact with the live wires within the box.

DIY Tips for Installing a Junction Box in the Ceiling
Installing a junction box in the ceiling is a relatively straightforward process, but it is important to make sure it is done correctly. Before beginning any electrical work, it is wise to plan ahead and familiarize yourself with the tools and materials that will be needed. Having the right supplies on hand will help the process go more smoothly.
If you are not experienced with electrical work, it is a good idea to seek guidance from experienced professionals. They can provide valuable advice and answer any questions that you may have about the process. Their expertise can help ensure that the job is done correctly and safely.
Conclusion
Installing a junction box in the ceiling is a relatively simple process, but it is important to take all necessary safety precautions. By following the steps outlined in this article, you can ensure that your junction box is properly and safely installed. Remember to always turn off the power before beginning any electrical work, use the right tools, and double check all connections. With the right preparation and knowledge, you can successfully install a junction box in the ceiling.