
Introduction
Having a loose kitchen faucet handle can be extremely frustrating. Not only does it make it hard to turn on and off the water, but it can also cause leaks if left unchecked. Fortunately, tightening a kitchen faucet handle is an easy task that anyone can do. This article will provide a detailed overview of how to properly tighten a kitchen faucet handle, from gathering the necessary tools and materials to testing the handle.
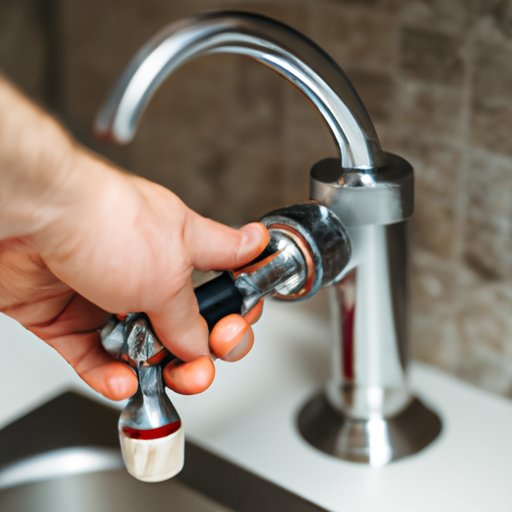
Step-by-Step Guide on How to Tighten a Kitchen Faucet Handle
Tightening a kitchen faucet handle is a relatively simple task. Here are the steps required to complete the job:
- Gather Necessary Tools and Materials. Before you begin, make sure you have all the necessary tools and materials on hand. These include a screwdriver, a wrench, plumber’s tape, and a cloth or rag.
- Identify the Source of the Problem. Take a close look at the handle and try to identify where the problem is coming from. In some cases, the handle may just be loose due to worn out screws or a loose nut.
- Unscrew the Screws Holding the Handle in Place. Using the screwdriver, carefully unscrew the screws that are holding the handle in place. Be careful not to over-tighten them when you put them back in place.
- Tighten the Nut Underneath the Handle. Once the screws are removed, you will be able to access the nut underneath the handle. Use the wrench to securely tighten the nut.
- Reattach the Handle. Place the handle back in place and use the screwdriver to reattach the screws. Make sure they are tightened securely, but not too tightly.
- Test the Handle. To make sure the handle is secure, turn on the water and test the handle by turning it on and off. If it feels secure and there are no leaks, then the job is done.

Tips for Troubleshooting and Fixing a Loose Kitchen Faucet Handle
If you’re having trouble tightening the handle, here are a few tips to help you troubleshoot the issue:
- Check the Screws. Make sure the screws are securely fastened. If they’re loose, tighten them up.
- Inspect the Handle for Damage or Wear. If the handle is damaged or worn, it may need to be replaced.
- Make Sure the Nut is Properly Secured. The nut should be securely fastened. If it’s loose, use the wrench to tighten it.
A Detailed Look at How to Securely Fasten a Kitchen Faucet Handle
To ensure the handle is firmly attached, follow these steps:
- Replace any Damaged Parts. If any of the parts are damaged, replace them before proceeding.
- Clean and Dry the Area Around the Handle. Use a rag or cloth to clean off any dirt or debris from the area around the handle.
- Apply Plumber’s Tape Around the Threads. Apply a layer of plumber’s tape around the threads of the handle and nut. This will help prevent leaks.
- Securely Tighten the Nut Beneath the Handle. Use the wrench to tightly secure the nut beneath the handle.

DIY: Quick and Easy Steps to Strengthen a Kitchen Faucet Handle
If your handle is still feeling loose, here are a few DIY tips to help strengthen it:
- Remove Excess Paint or Debris from the Handle. Use a cloth or brush to remove any excess paint or debris from the handle.
- Use Sandpaper to Smooth Rough Edges. If there are any rough edges, use sandpaper to smooth them out.
- Apply a Layer of lubricant to the Handle. Apply a thin layer of lubricant to the handle to reduce friction and make it easier to turn.
- Reattach the Handle and Securely Fasten the Nut. Reattach the handle and use the wrench to securely fasten the nut.
Simple Solutions for a Wiggly Kitchen Faucet Handle
If your handle is still wiggling, here are a few solutions to try:
- Tighten any Loose Screws. Check the screws holding the handle in place and make sure they’re tightened securely.
- Adjust the Position of the Handle. Adjust the position of the handle so it sits flush against the base.
- Reinforce the Handle with Extra Support. If the handle is still wiggling, reinforce it with extra support such as a bracket or screw.

How to Make Sure Your Kitchen Faucet Handle is Firmly Attached
Once you’ve tightened the handle, here are a few tips to make sure it stays firmly attached:
- Check the Handle for Movement. Give the handle a gentle shake to make sure it’s securely fastened.
- Make Sure All Parts are Securely Fastened. Double check that all screws, nuts, and bolts are securely fastened.
- Test the Handle by Turning it On and Off. Turn on the water and test the handle by turning it on and off. If it feels secure and there are no leaks, then the job is done.
Troubleshooting 101: How to Tighten a Kitchen Faucet Handle
If you’re still having trouble tightening the handle, here are a few tips to help you troubleshoot the issue:
- Identify the Source of the Problem. Take a close look at the handle and try to identify where the problem is coming from.
- Check the Handle for Damage or Wear. If the handle is damaged or worn, it may need to be replaced.
- Replace Any Damaged Parts. If any of the parts are damaged, replace them before proceeding.
- Make Sure All Parts are Securely Fastened. Double check that all screws, nuts, and bolts are securely fastened.
Conclusion
Tightening a kitchen faucet handle is a relatively simple task that anyone can do. By following the steps outlined above, you can easily fix a loose or wiggly kitchen faucet handle. Be sure to check the handle for damage or wear, replace any damaged parts, and make sure all parts are securely fastened. And don’t forget to test the handle by turning it on and off.